SMOKE
This page on smoke will be exploring all types of smoke i can get my hands on. I will research the use of smoke bombs in many different ways. For this unit my main focus will be on both colour & texture of the smoke - i will be making sure i can capture vibrant smoke in my outcomes through photoshop.
Mood-Baord

|
|
|
Ideas
|

|
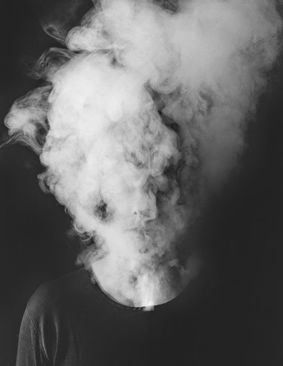
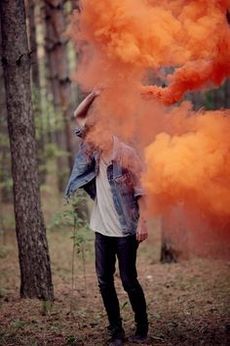
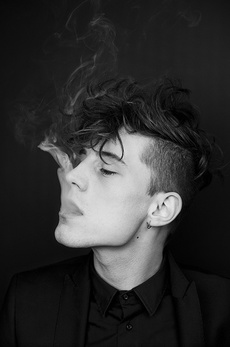
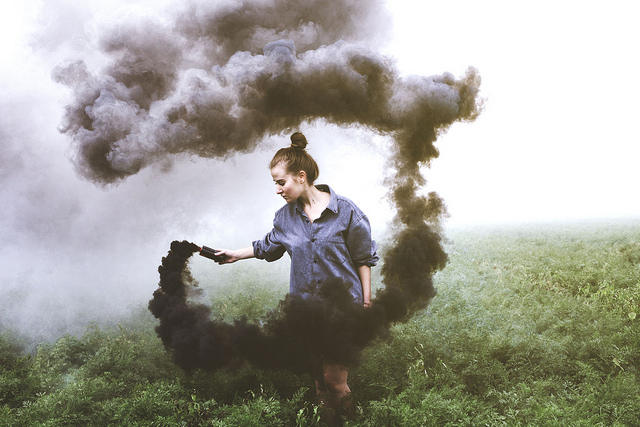
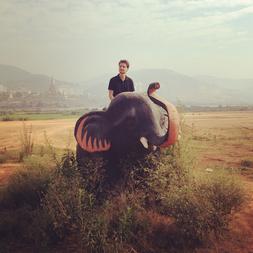
These are my two main ideas for this page. The first photo is a model in the middle of the smoke, i would be aiming for the smoke to fill the frame and the model's outline and some features to be seen. Furthermore the second photograph i would want the model to be in a field and hold a grenade smoke bomb so that he colour of it would be obvious and bright as well as be the obvious subject of the image.
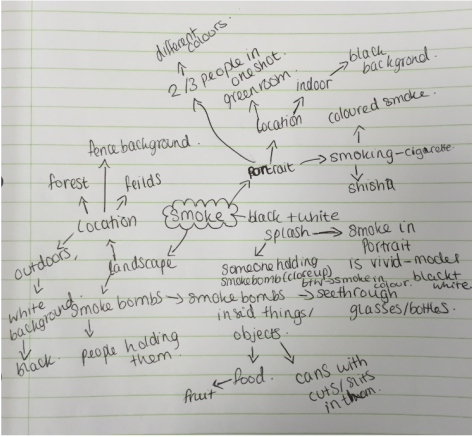
Brainstorm
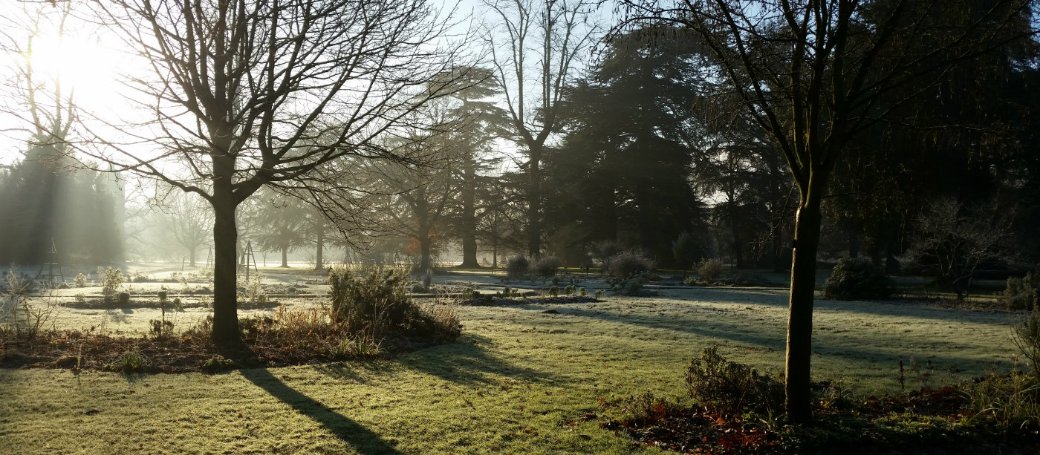
Locations
|
|
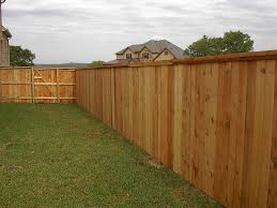
Here are 2 locations which i will use to take photographs for this unit. The first one is a fence, i will use my garden where i have a dark coloured fence, i will use this as the background. The second location is Osterley park, i would use the field and trees as the background for this along with a model in both locations.
Collection of Smoke Bomb photographers
This is a Curtis Spahl photograph. I like this image a lot as the smoke is black, i think this is different rather than having typical vibrant smoke colours. It allows the image to have created a darker/serious atmosphere. Not only this but the smoke blends in more with the washed out background and therefore there isn't any colour clash. Furthermore, the location of this image is something that i think works well. The location portrays a sense of mystery as well as an atmosphere of adventure.
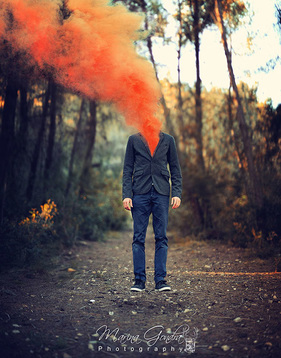
Marina Gondar's photograph is what i would like to attempt and create as a possible final piece. I like this photograph because of the surrealism within it. The colour of the smoke bomb also matches the colour of the sun hitting certain parts of the forests background. This photograph allows the viewers to understand how the model might be lost or have a loss of identity. Furthermore i think that the natural lighting in this image really works well with the smoke bomb colour and the mood of the photo, which is an intense atmosphere.
|
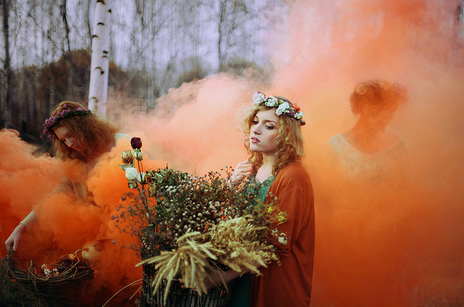
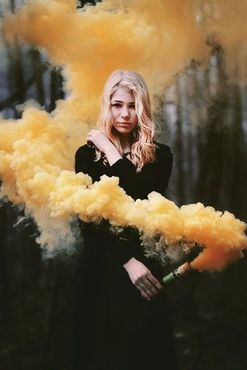
Levitsky's photograph is one which i like due to the theme it has. This theme of flowers and colour is something that i would like to recreate in the theme of seasons. I like this image because the smoke in has taken up a lot of the image, furthermore the smoke has been captured well and appears visually clear - not blurry. I also like the way there are three people in this photograph, however the one in the middle is the main focus, additionally she is the most clear and colourful in the face.

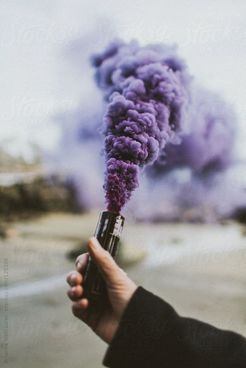
Marie Klucaric took this image. I really like the natural lighting in the photograph, the way the border and corner of the photograph are almost not visible but the model and smoke are clearly in site and the main focus. I also like how the colour of the smoke and the models hair match, they work well together and create a romantic/loving mood with the use of these two colours.
|
Recreation

|
|
|
Maciek Jasik
|
"The Secret Lives of Fruits and Vegetables" The modern world has separated us from the origins and uses of fruits and vegetables; we know them only for the flavors and textures they provide. |
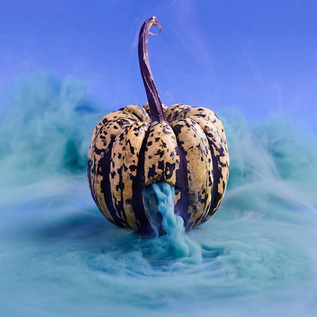
This is my most favourable photograph from Jasik's collection. I personally really like the tone of blue that has been used in this, furthermore the smoke bomb has filled the image and blended in with the background i think that this sets a better atmosphere to the image rather than a small amount of smoke. Lastly the fruit that has been used is very unusual and due to this the image becomes more interesting and draws you in further.
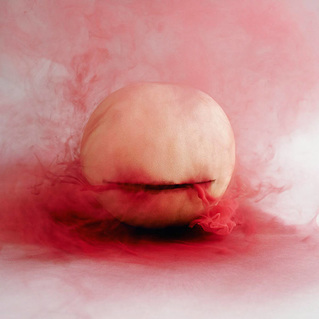
This Photograph is different to the previous two, i like this because the smoke has not appeared to seem like it is pouring out of the fruit this time. The smoke has taken up most of the frame and left a red atmosphere. Additionally the white and red combination of colour has worked well together, i think that this allowed the smoke to stand out more that the subject of the image though.
|
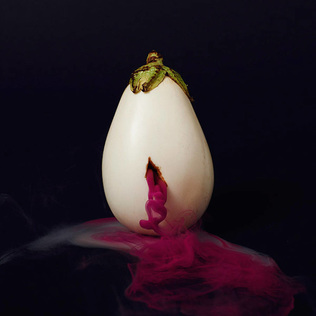
This is an image i like a lot. I like this photograph because of the colour palette. I like how the vegetable used is white and the smoke is maroon. Not only this but i think the use of the black backdrop really allows the smoke to stand out. furthermore the subject is centered and i think this draws more attention to the way the smoke is coming out of the vegetable. Lastly the way the smoke looks like it's pouring out as if it's creating a pool of smoke is something i'd like to imitate.
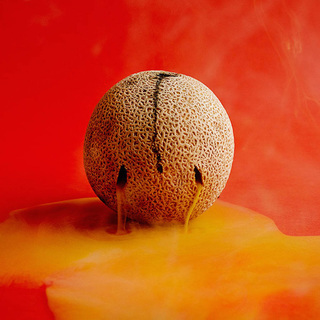
This is one of my favourite images from the smoke bomb shoot. The photographer has used a melon in this image, and used a orange smoke bomb. I like this photograph as the smoke coming out of the fruit looks as if it's pouring out onto the ground. Furthermore you can see that the fruit has been lit from the side, I would use this lighting technique when i create my photos.
|
Photoshoot 1
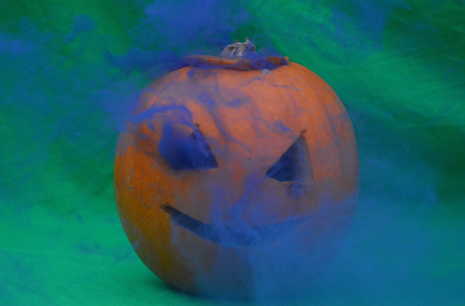
This photoshoot was done in my garden, i used a green backdrop so that i can easily edit the colour of it in photoshop. For this i used a purple smoke bomb and an orange pumpkin. The aim of this shoot was to capture the smoke coming out of the pumpkin, also to make it look like the smoke is continuously pouring out of the pumpkin.
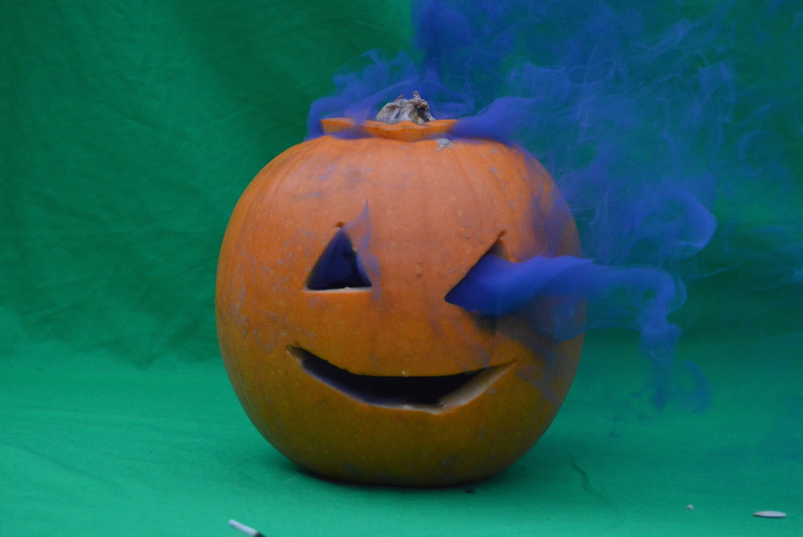
This is one of my best photos from this shoot. I think that this image was successful as i have strongly captured the smoke coming out of the pumpkin - it does not appear blurred which is what i was hoping for. Secondly i took this shoot outside so i relied completely on natural lighting, i think that because of this the photos may seem flat. Moreover, i like the way the smoke is coming out of one eye and the top, even though there isn't a great amount of smoke filling up the frame, the smoke is thick and sets a mystical atmosphere.
|
This is my second favourite image, i chose this one due to the way the smoke has expanded in the photograph - firstly is comes out of the pumpkin thick but gradually thins out to fill the atmosphere up. I like this as it still allows the subject of the image to be visible and clear, not only that but the smoke bomb has been captured well. Lastly i used a green background for these photos, this was so that when if i come to editing them on photoshop it will be easier to change the colour of the backdrop to match the colour of the smoke - this idea was inspired by Jasik.
|
Photoshoot 2
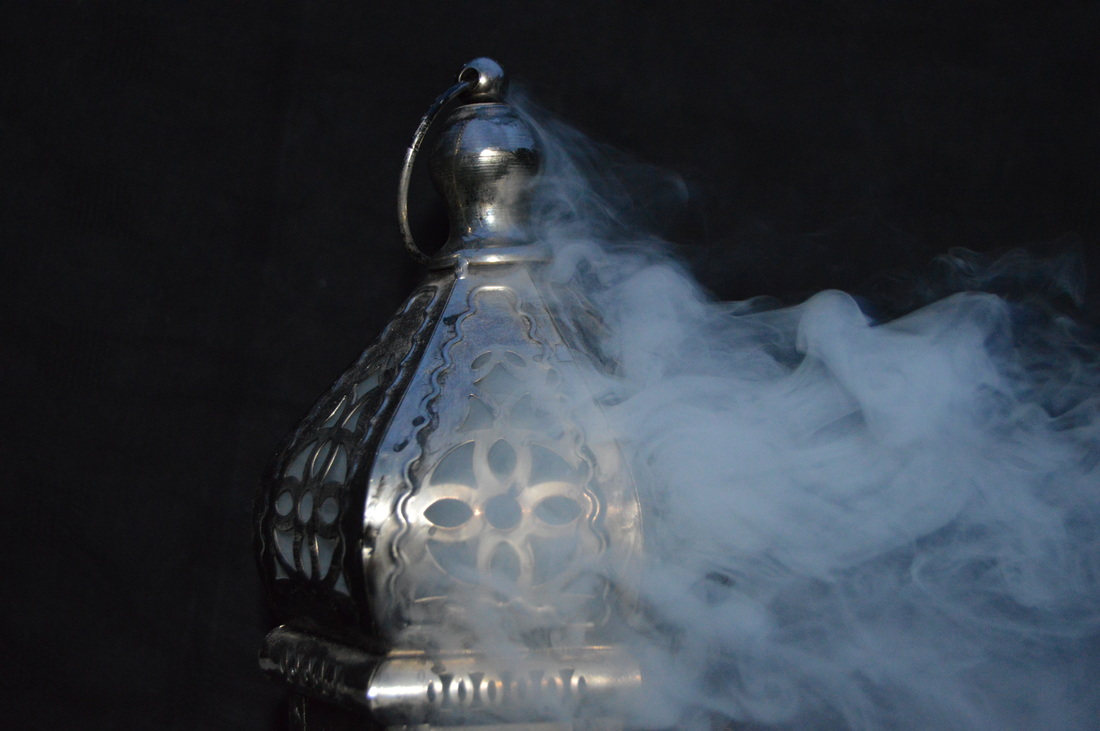
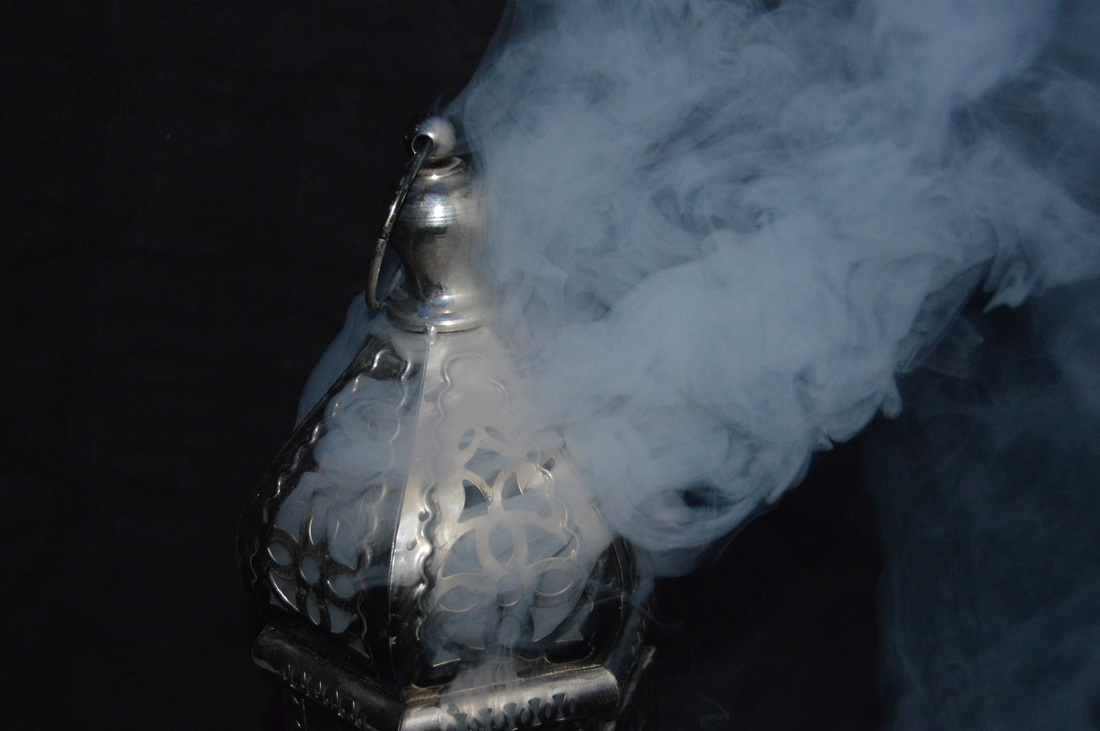
This is a photo shoot which i did in my garden, i used a black backdrop for this. I was inspired by Maseik Jasik with this shoot. Instead of putting the bombs inside fruit i decided to use metal materials, i thought that with this subject combined with the smoke it would create a majestic, Moroccan theme/atmosphere. My aim for this shoot was to capture the smoke coming out of the shaped holes which the subject had. For this i had my camera of portrait mode so i could have the flash and take photos quick enough to capture what i needed.

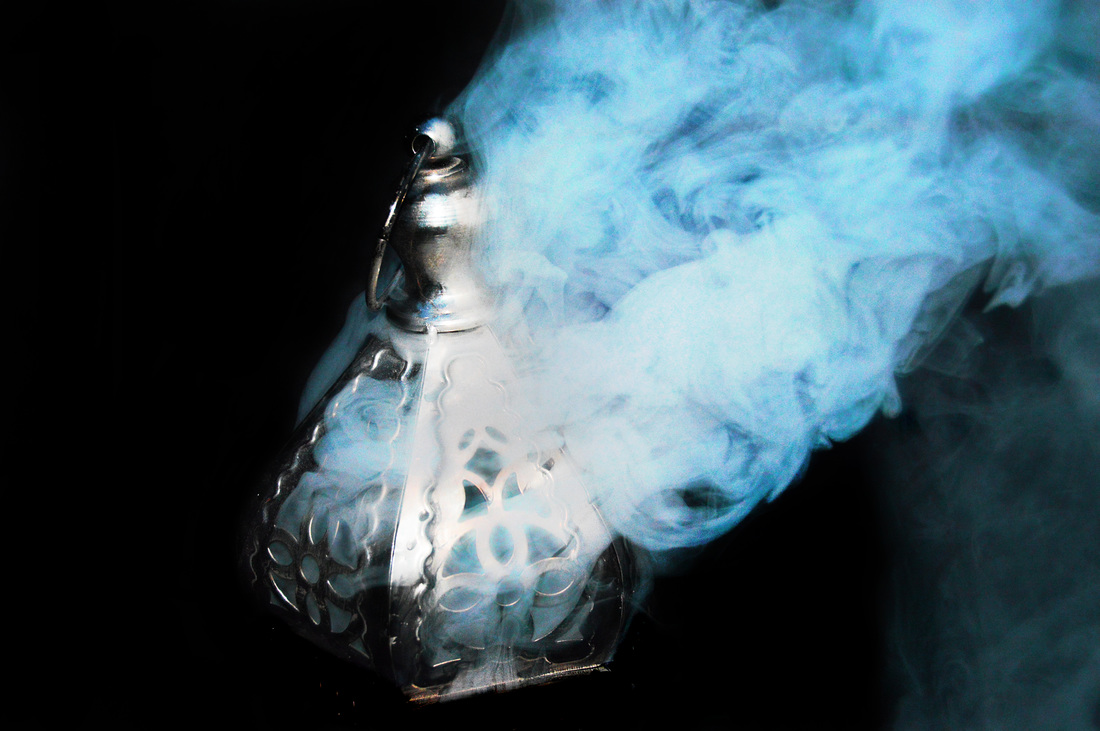
This is my favourite image from this shoot, i like this photo because i have captured the smoke well - it hasn't blurred and has come out of the objects holes. Also the smoke bomb which i have used is white but appears have a hint of blue in it, with this i will be able to change the colour of the smoke on photoshop more easy. I chose to use a lantern for my object because i thought that silver would contrast well with the smoke, also i could make a small series of these with other objects that are a similar material and colour. I did this photoshoot outside so i used natural lighting as well as the flash on my camera, so i like the way the left part of the image is much darker the the right side.
|
This is the second most favourable photo from the shoot, i like the way i have composed this by centring the lantern and the smoke is coming out of it and being directly blown to the right. For this photoshoot i took it outside and set up a black backdrop, furthermore i used the flash mode on my camera for this. I did this so that the smoke and lantern would not appear flat, i have therefore captured some depth within this photograph. With this image i will edit in photoshop and further exaggerate the hint of blue within the smoke, furthermore create even more depth with the smoke and try to apply a more 3D look.
|
Photoshoot 3
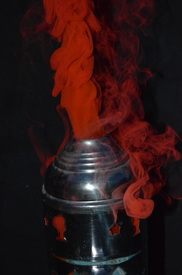
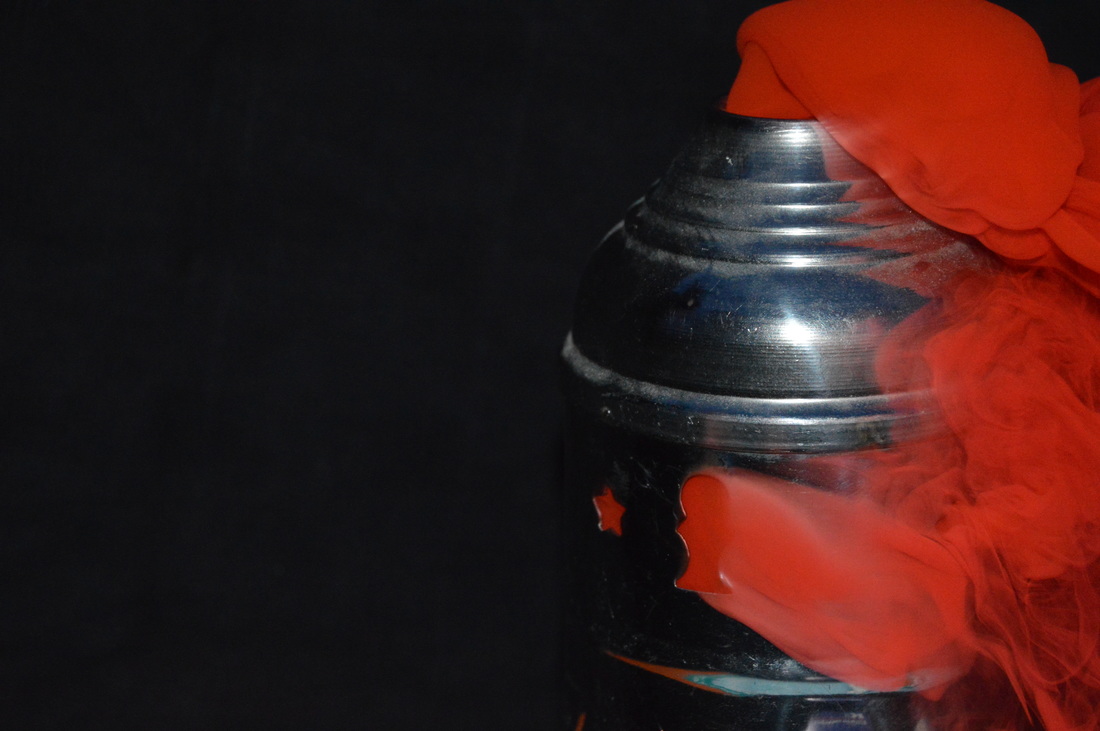
This photoshoot is done in my garden as well using a black backdrop. For this one i used a bigger smoke bomb which came in the pack i purchased. This colour was a deep red, i really liked the way this smoke bomb worked with the object's colour, furthermore my aim for this was to capture the smoke coming out of the object at different stages of quantity.
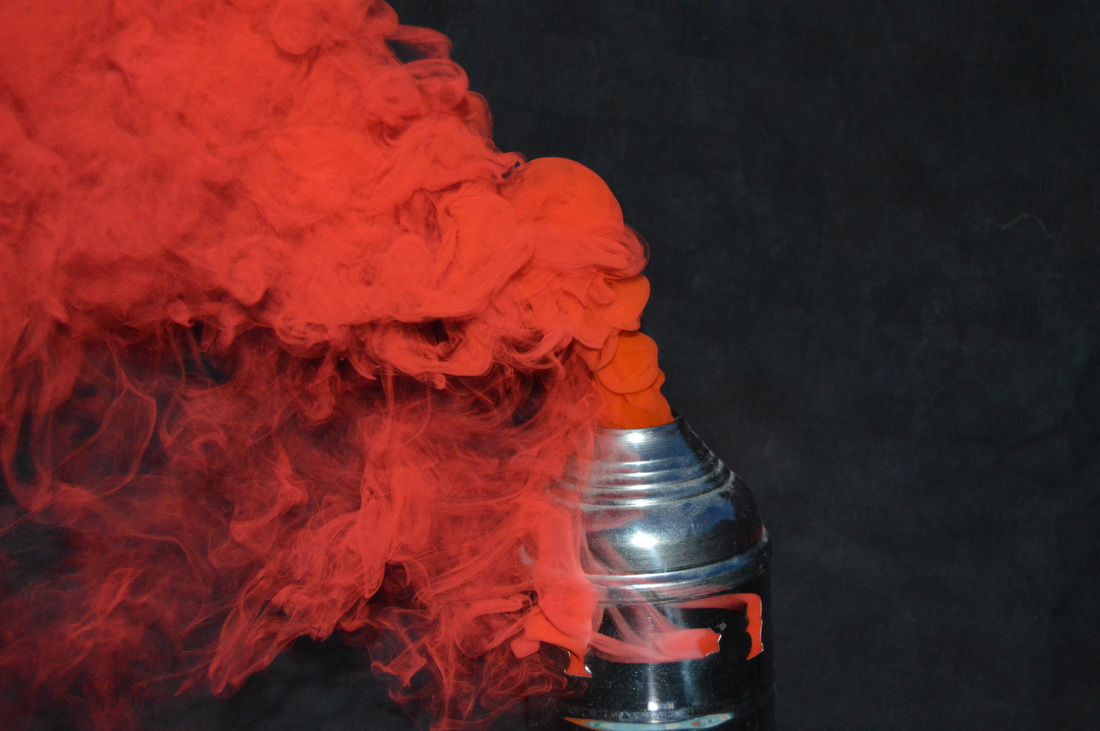
this would be my favourite picture from the shoot, i centered the subject so it was the main focus, i like the way the smoke has come out, it looks really thick, this is what i was aiming for - the smoke to be clearly seen and appear mystical. I did this shoot outside with a black background, i used natural light in the evening as well as the flash on the camera. Moreover, i chose to use a silver metal object with the red smoke as i knew these colours would work well together, also the colour of the smoke would reflect off the object.
|
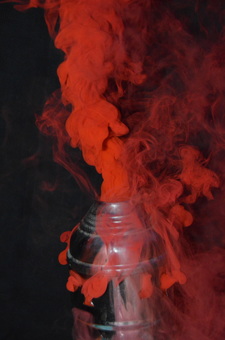
This is my second image that i like, i did this one in my garden as well and using the flash as lighting. I liked the way the smoke was coming out of the object as this was what I was aiming for - the smoke is 'spilling' out of the sides of the vase, this comes from my inspiration of Jasik's work. Furthermore i use the black background so that when i Photoshop this photo i will make the backdrop completely black and this will allow the colour of the smoke to stand out bright.
|
Photoshoot 4
|
|
This was my second attempt at doing the pumpkin and smoke bomb shoot, this time i did it when it was darker, furthermore more i used a light to make the images look less flat. I noticed that this time you could actually see the real colour of the smoke bomb rather than a deep blue like above. I didn't think these photographs came out as expected, the shoot wasn't successful as it was very windy and it was hard to capture a lot of smoke. Also the carvings from before were covered up but didn't allow the smoke to come out properly through the new carvings. |
Photoshoot 5
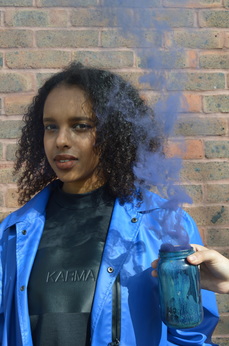
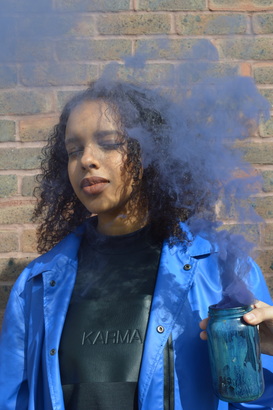
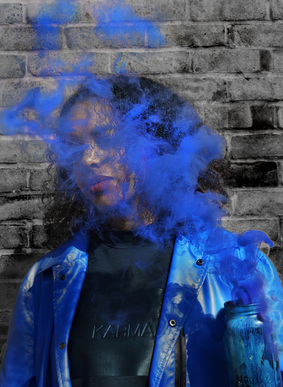
This photoshoot was done against a brick wall, initially i wanted to do it against a plain wall but i preferred to do this as it adds more to the photo and creates that rough look which i found in photos from my moodboard. I did this shoot outside and used natural lighting, luckily the weather was good and worked to my advantage.
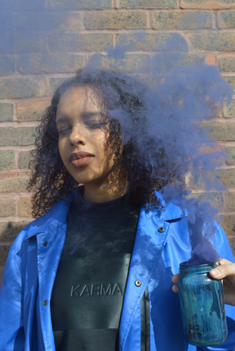
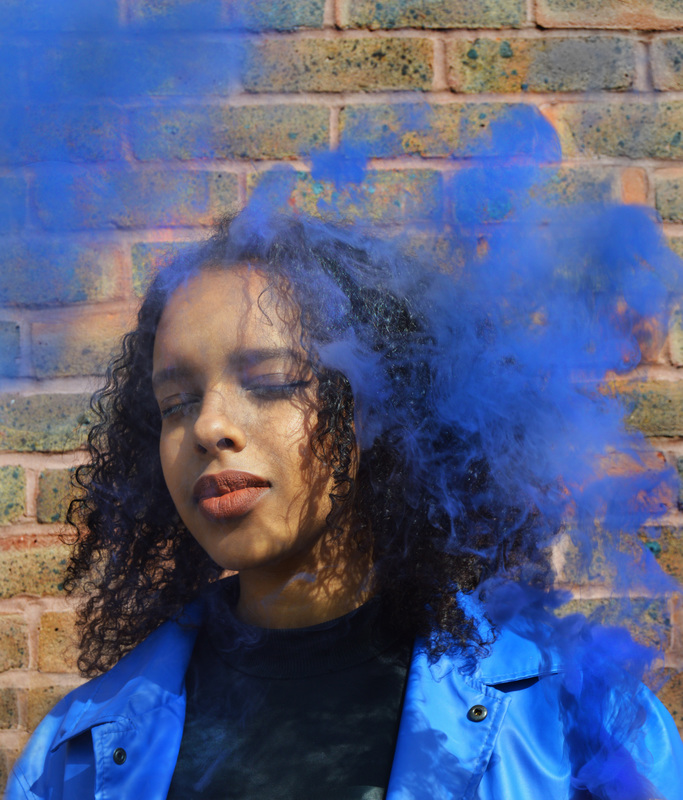
This is one of my favourite images from the shoot, I shot this outside against a brick wall outside using natural lighting. I got someone to hold the smoke bomb slightly below and to the right side of the model so that the wind would blow the smoke towards the models face. Furthermore i used a blue smoke bomb for this and asked the model to wear a blue jacket with black underneath, this way there would be contrast with the 2 colours. I will definitely be using this in photoshop for a hopeful final piece. Furthermore, i like the way the lighting is hitting the face and creating shadows on the face and jacket.
|

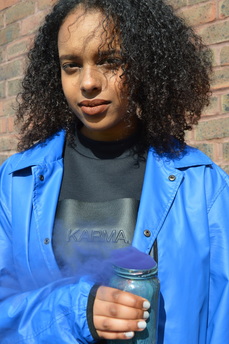
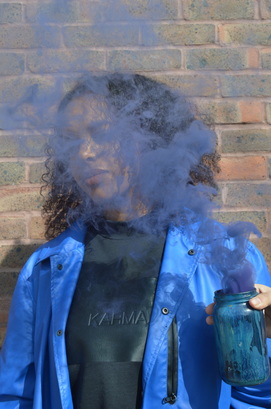
This is my favourite photograph, this is because i have achieved what i actually wanted from one of my photographer researches. I wanted the smoke to go over the face but still be able to see some face features, and i have successfully captured this. I think that this photo gives a mystical theme and atmosphere, which is what i was going for. Furthermore, i got someone to hold the bomb slightly higher up in the wind blew a lot of in the front of her face.
|
|
|
These photos are for an idea i have, i will be using these images in Photoshop and erasing her head and replacing it with smoke coming out out of it. Or i will just overlay smoke over her head and make the face not that visible. |
Experimentation
|
Before:
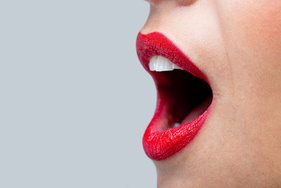
|
After:
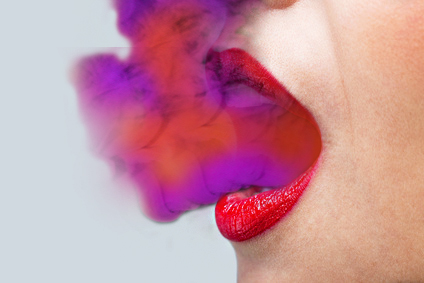
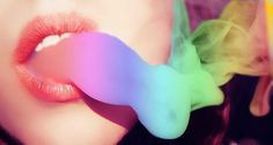
This was a small experimentation i did on photoshop, i used ,original photo of smoke bombs and overlaid it with a secondary image from google. I rotated the smoke image over the mouth and began to erase the parts of the smoke i didn't want. I used the clone tool to expand the amount of smoke that was coming out of the mouth, i also changed the hue/saturation of the image, then used the eraser to bring back some of the red toned in the smoke. Lastly i used the eraser and turned down the flow so i could blend the smoke out with the background - the edges weren't too sharp.
|
|

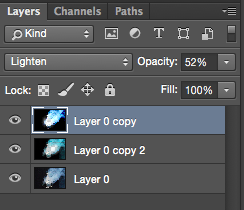
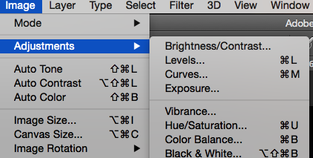
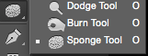
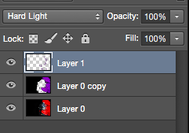
This is my first final outcome, i used the burn tool to black out the whole background, and to erase the bottom of the lantern. Also i used the dodge tool on the middle of the smoke to create a contrast within the smoke. Not only that but i used this to highlight areas on the lantern. Furthermore i went on levels and created a new layer, i overlaid this with 'lighten' and turned the opacity down to 52%. Once i had done this i took the sponge tool to enhance the blue tint on the smoke and used the sharpen tool all over the photo so the clarity was high.
|
|

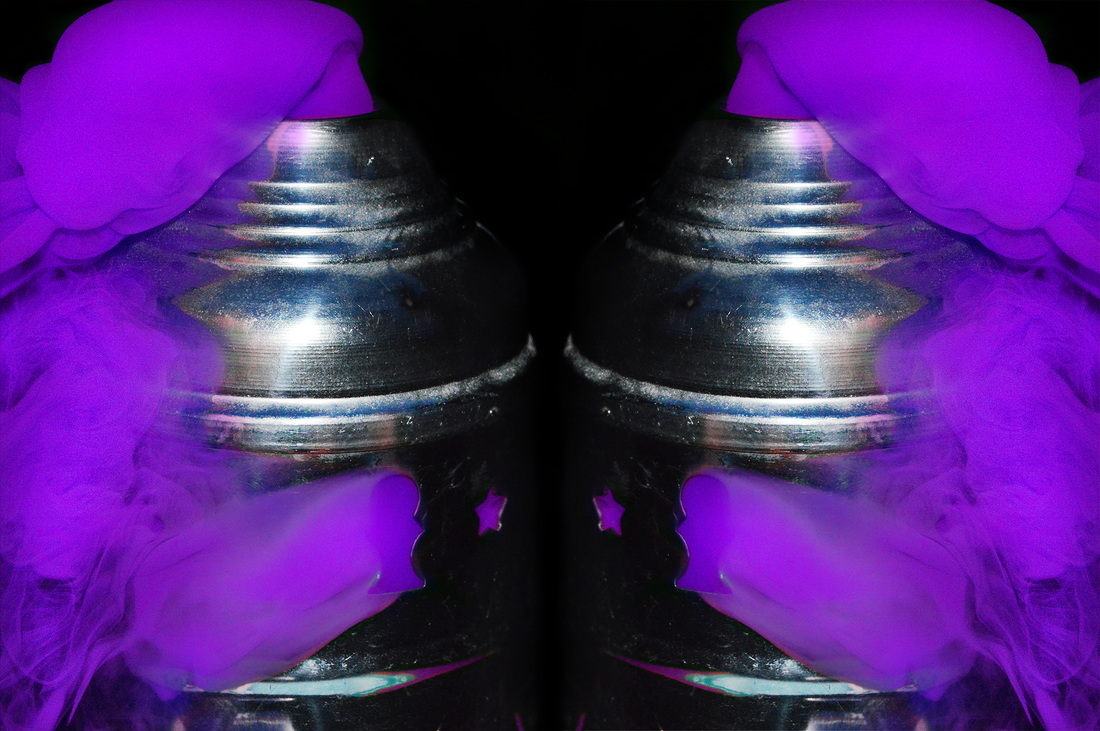
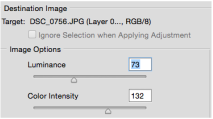
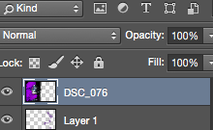
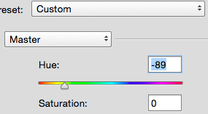
I really like the way this photo has turned out and is definitely a final piece. The first thing i did was use the burn tool to get rid of the background and create a contrast in the photo. After that i used the dodge tool to highlight parts of the silver object. next i went on to the levels setting and changed the luminance to 73 and colour intensity to 132 - gave depth to the image. I decided to change the hue to -89 and this gave me a deep purple which i really liked. To make the image cleaner i took the eraser and removed all purple parts which weren't relevant. Lastly i took this image and duplicated it on the same photo, i rotated it so it appeared symmetrical. Once i did that i used the sponge tool and sharpen tool to make the final touches.
|
|

|
|
|
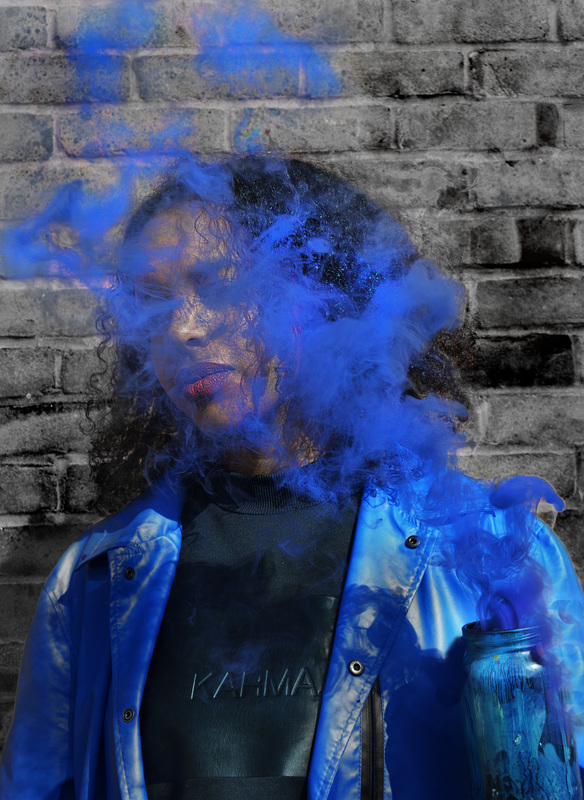
Firstly i adjusted the brightness/contrast of this image, i then used the burn tool on the bricks in the image to stop the photo from appearing 2D. Then i duplicated the layer and cloned some of the some on the top left to create more smoke. I used the healing tool on the models face to remove any blemishes. Furthermore i used the sponge tool on saturate to enhance the colour of the smoke and make it stand out more. Lastly i used an app called vsco cam to add a filter on top of the image, i only applied this filter on an intensity of 2. i also used this app to sharpen the photo and turned up the 'highlights save' on 2 as well. The last thing i did to the image was crop it so that the focus stays on the smoke around the models face.
|
|
|
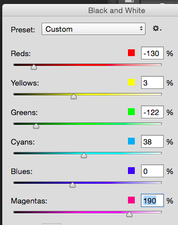
This is one of my favourite experimentations, i first changed the brightness and contrast of the photo. I began using the sponge tool and burn tool on the smoke and the brick wall, but i found that everything was too saturated so i decided to try colour splash, i made the photo black and white and changed the levels to what i thought looked good. I liked this and then started using the burn and sponge tool again to enhance the smoke and make it really stand out and also make sure the jacket and smoke matched equally. I also added another layer and used the clone tool to remove the hand that was holding the jar in the image. I then used the blur tool to blur out harsh lines. After that i used the sharpen tool to make sure the textures of the smoke really stood out. Lastly i cropped the photo because i thought there was unneeded extra space at the bottom of the photograph.
|
Final Pieces