AO1
'Develop their ideas through sustained and focused investigations informed by contextual and other sources, demonstrating analytical and critical understanding'
Johan Rosenmunthe
|
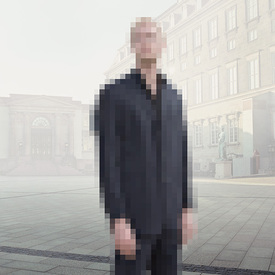
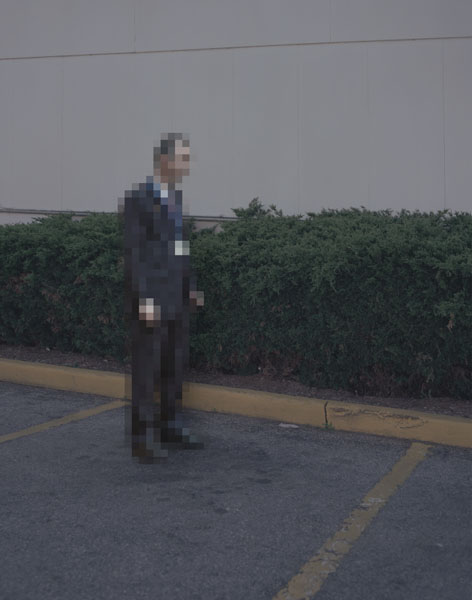
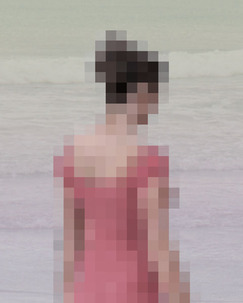
A photography project by artist Johan Rosenmunthe. Pixelated people, while the surroundings are as analog as possible. A way to think about our place in this new dematerialized environment. The artist use pictures found on Facebook, from people he only knows through the Internet. |


|
This is one of my favourite photo's from Johan Rosenmunthe's photography project of pix-elated people. in this we see a women on the setting of a beach on he own. I like this image because the subject of the photo is more close up rather than further away, like his other work he created. As well as this she is facing away from the camera and not towards it, this may connote message the photographer is trying to get across, maybe she is feeling lonely/alone. The colour pink suggest's a more lighthearted atmosphere. The pixels of this photo are also of bigger size/have been exaggerated which creates a more distorted look, almost showing her identity being hidden. I also appreciate the background of this photo, the waves, because it gives a lost and mysterious mood and feel to the photograph. |
|
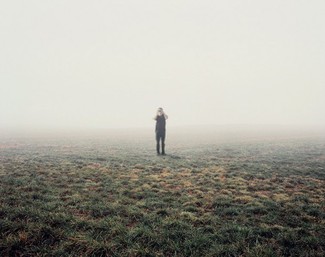
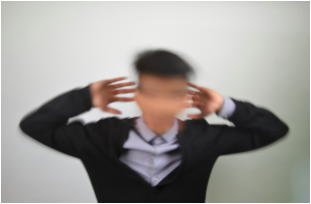
This is another photograph which i like from Rosenmunthe's work. In this image the person has been framed far away from the camera, appearing to be covering his face with his hands. The setting of this photograph in in a misty field. i like this image from this particular style of work because the environment is in focus and the yellows and greens of the grass stand out, these colours connote nature and calmness. However the fact he is covering his face may suggest other things. the subject of the image is pix-elated but the rest of the image is in focus. |
|
Recreation of Rosenmunthe's Work
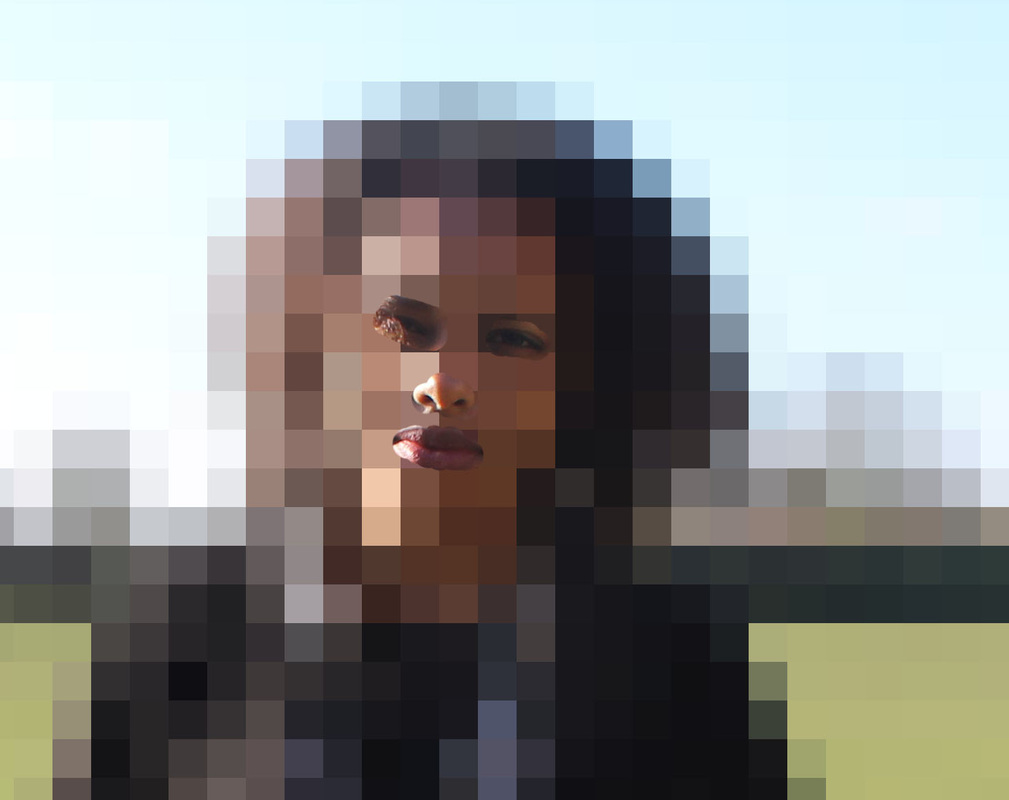
This is my Rosenmunthe inspired work. Here i recreated 4 different photographs in my chosen photographer's style. for my first image i took a close up and then pix-elated the subject of the photo. For the second image i took the photo further away from the model and again i kept the background in full focus. my third image i kept the model in focus and pix-elated the background and for my last piece i decided to pix-elate the whole of the image out but keep the main features of the face in focus.
Anon
|
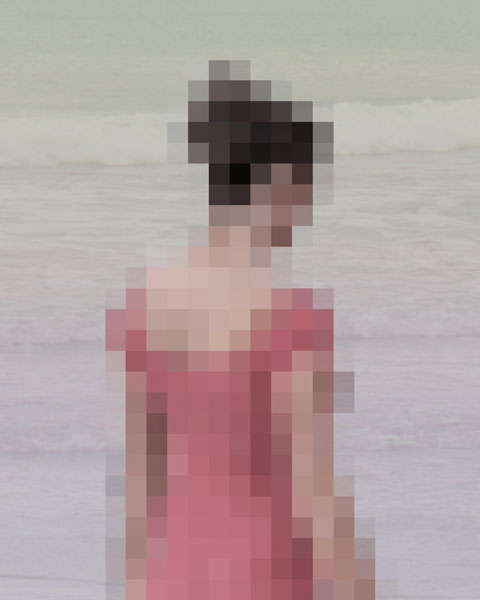
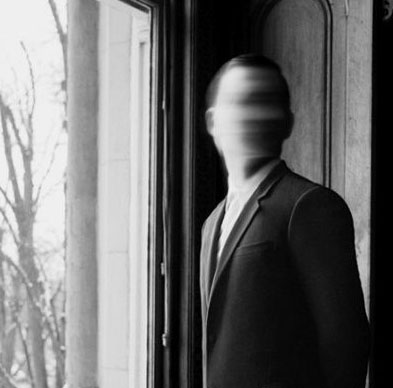
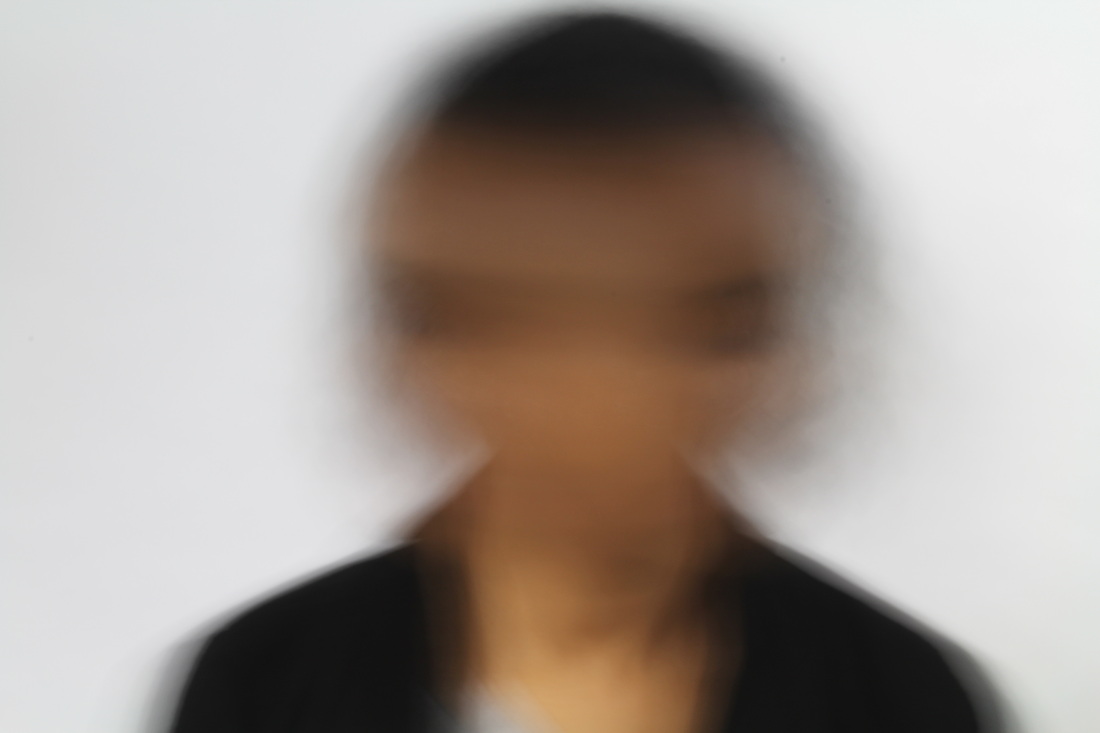
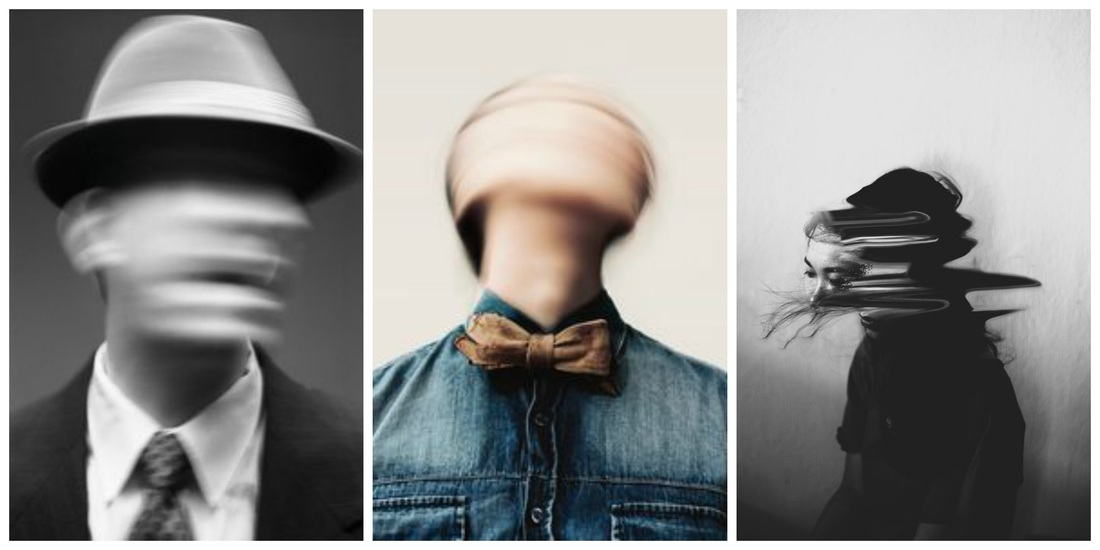
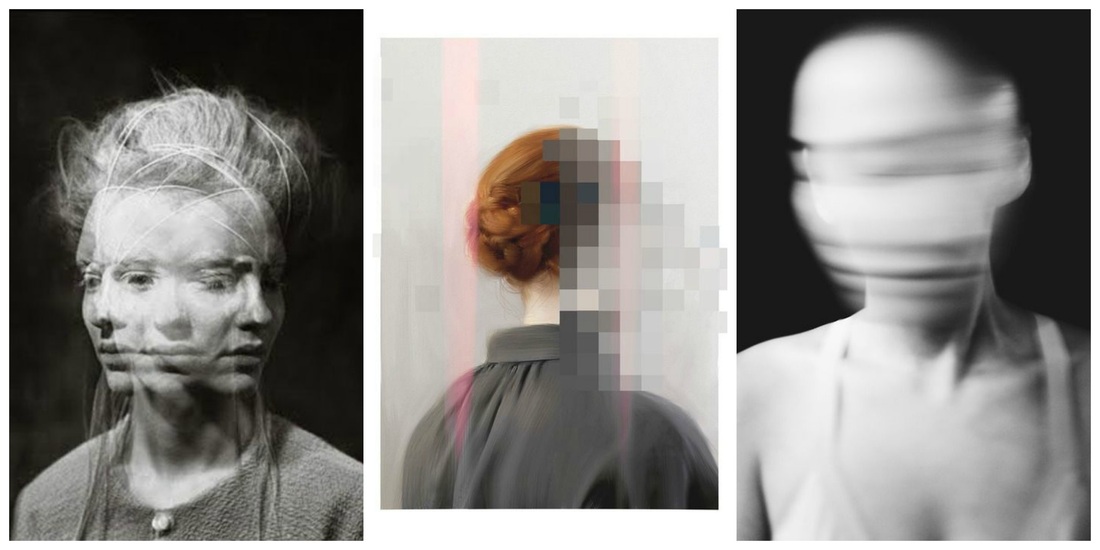
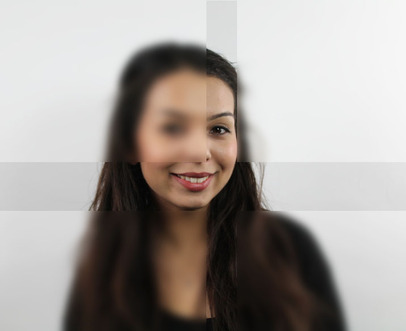
I found this small collection of photograph's on Pinterest, these photograph's are found under the blurred portrait images. The photographs are black and white or discoloured. The blurred affect on the faces are created using long exposure, and possibly enhanced by photoshop. |


|
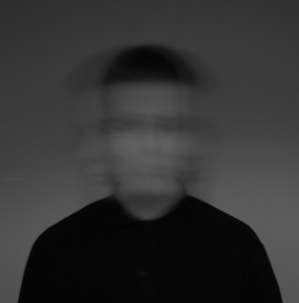
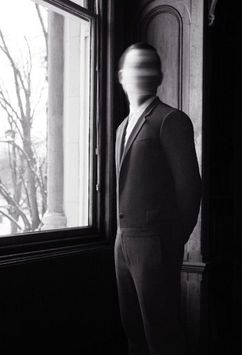
This is an image that i most like from the my anonymous collection of photo's. This is one of the best inspirational photographs to help me create this style of work. The images are all black and white i believe this adds to the mood of the photo which would a deep message possibly showing loss of identity/personality. I don't think anything in this photograph has been exaggerated. This image will help me with my work as i will attempt to blur out faces, this was done by long exposure which i will experiment with as well as using photoshop to do this. Unlike the other artist, this was taken using artificial lighting/studio. |
|
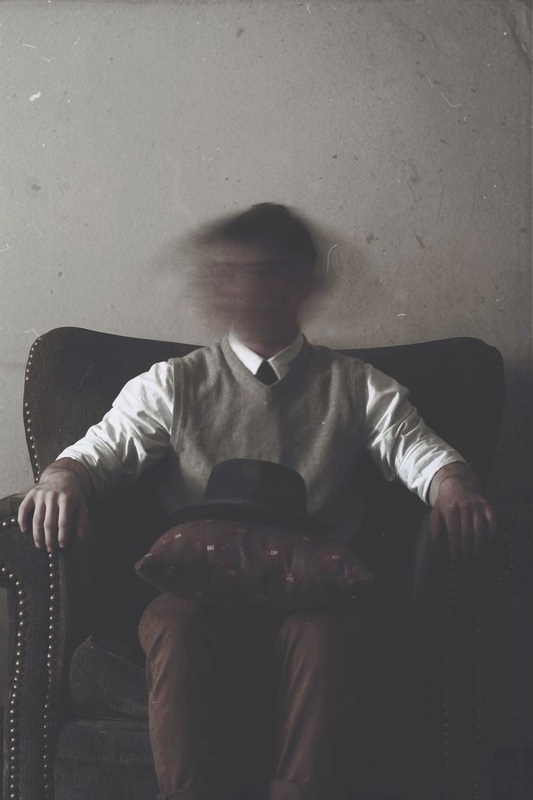
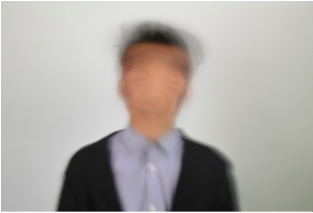
This photograph is in fact by Brette -. In this photograph the model is a man in a suit standing beside the window, but looking in another direction. I like this photo because it conveys that this man has a story behind his character. As well as that his face is completely blurred out which once again may suggest a loss of identity or direction. This may have been done using photoshop. This photo is in black and white, these dull colours connote sadness or a dark place in life, also due to the fact the face has been blurred out fits in with the possible message of the photograph. This will help my when creating my final pieces as i will experiment with black and white as well as using photoshop to blur the face. This image was also taken using natural lighting which i will experiment with too and see which lighting style is more suitable. |
|
Recreation
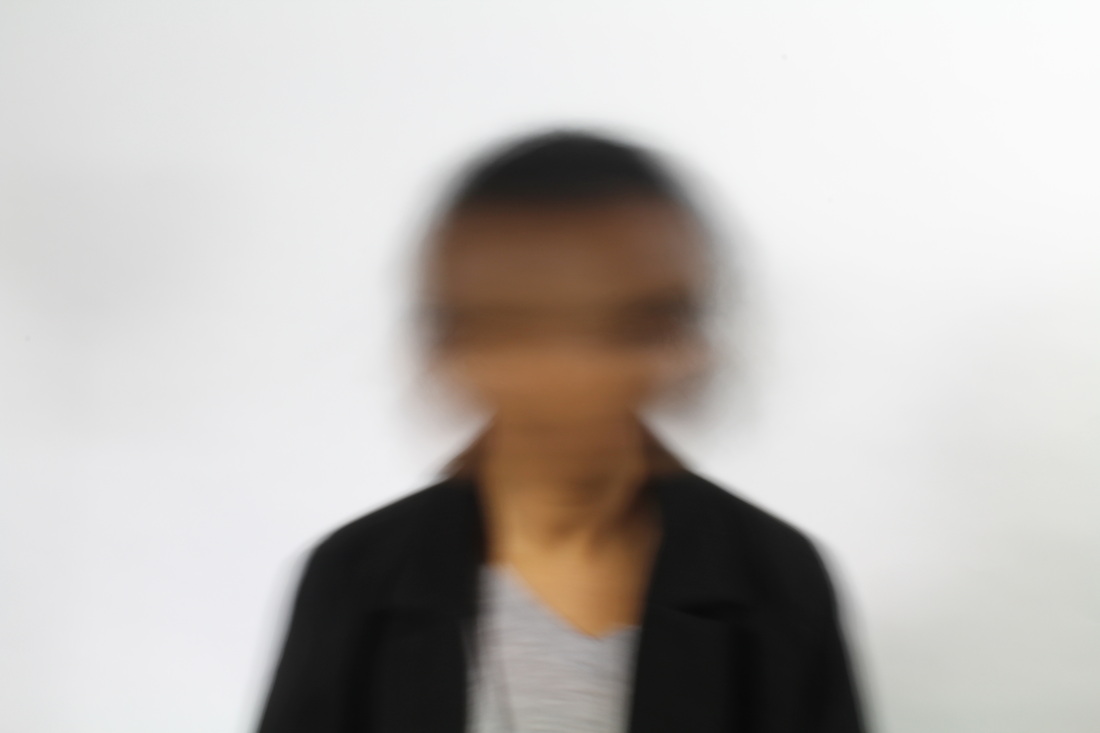
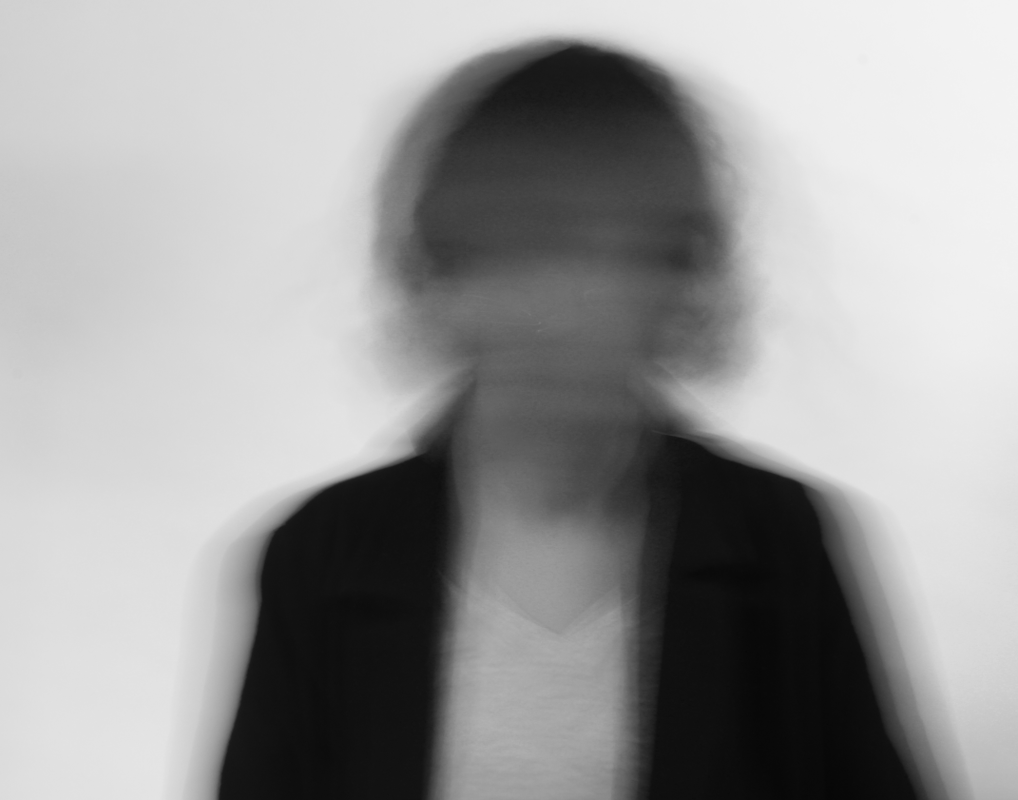
These are my recreated images from the photographer research I've done above. For this i used artificial lighting by using the green room, I did not use photoshop to create these effects, used long exposure and asked y model to move there head from side to side at different speeds. For the first image i centred the model on a white background. of the song one i used the rule of thirds and used photoshop to desaturate the image to be more similar to the work above. Lastly i took a close up long exposure of her to vary the shots. To improve this i would need to make are the models upper body doesn't move as this is ruining the illusion created and also isn't the same as the artists i am recreating.
ANON - Liber
|
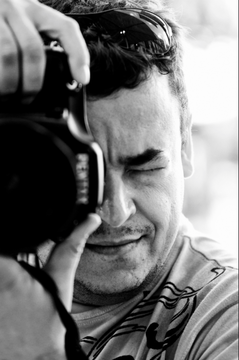
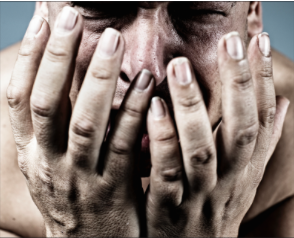
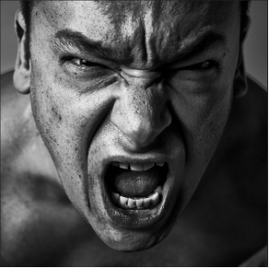
Ricardo Liberato gets photographs taken of him whilst he travels around the world. These particular images from his collection that is showing great emotion - mostly anger and sadness. |


|
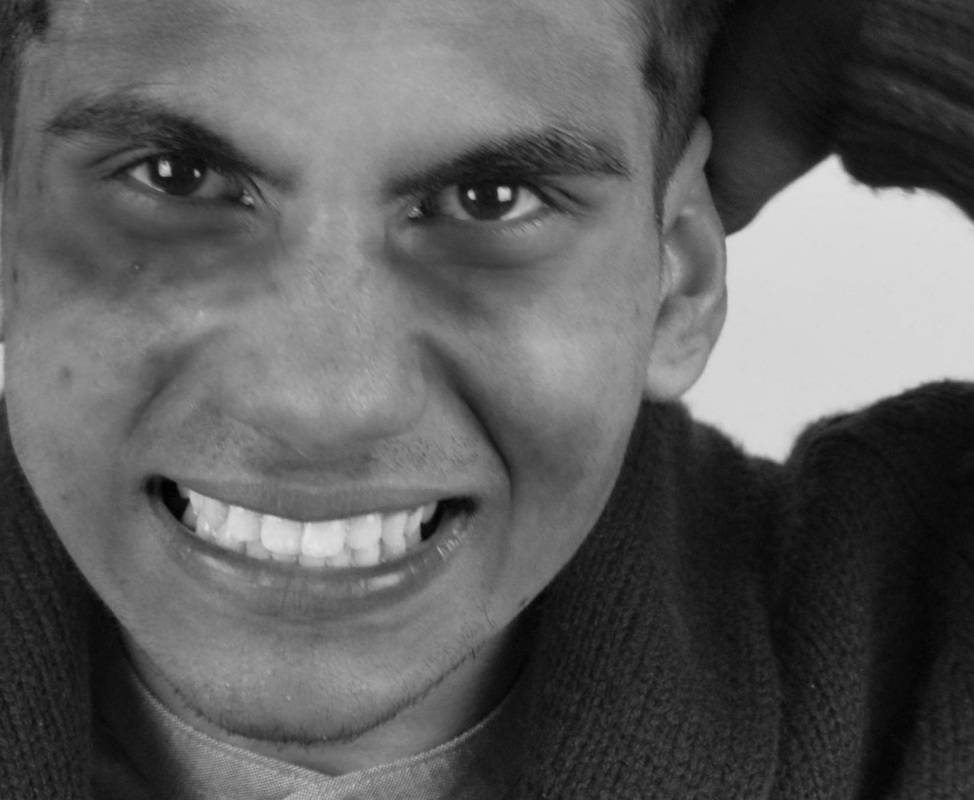
This is one of my most favourable images from the collection above. In this Liber has been portrayed as furious, and his facial expressions clearly express this. The image has been composed using a square as frame to his face and also it has been taken as close up. A close up on this allows the image to fully show and convey the negative and aggressive mood of the photograph. Also the photograph is in black and white, i feel that this lets the images message stand out a lot more as the facial expression is the only thing which is brought attention to. It seems that split lighting has been used when taking this, possibly suggesting how his feelings are hidden but now being released. This can link in with my work - by using emotion in my photos and over lying the images so it looks chaotic and the expressions are very obvious. |
|
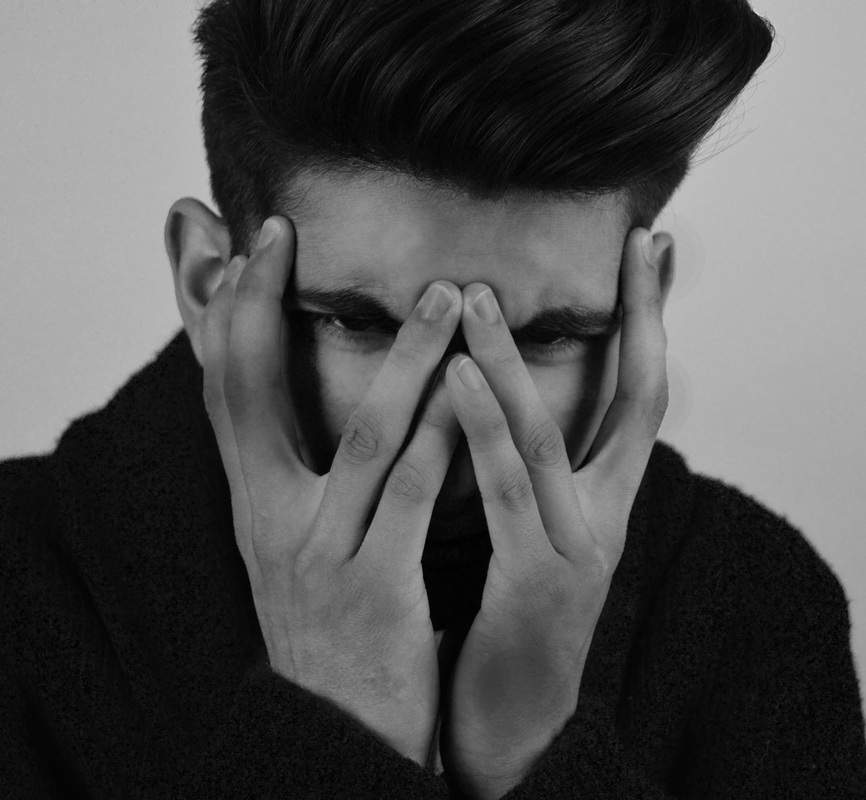
This is the second image which i like a lot. I like this because although you can't see his face, his eyes and hands are mostly visible. The facial expression and the use of his hands in this image convey pain and anger. The models positioning where his hands are masked over his face shows that he is hiding from his fears and is creating a barrier between his pain and himself. his photograph has been taken as a close up, allowing us to fully capture the emotion portrayed within this image. This images colouring has a blue hue to it which really signifies with emotion within the image as the colour represents sadness and pain. I thought that within this image the audience has an chance to find their own connotation of what the story behind the image is. This has been taken inside using artificial studio light, allowing the lighting style to connote the different mood/atmosphere required by the photographer. |

|
Liber Recreation
This is my recreation of Liber's photograph's, i used the green room to produce these recreations. I used to big soft lights on the model for this. For the first recreation i asked the model to place his hands over his face, and then asked him to create a look of anger on his face. i then took this photograph close up, however this wasn't close enough to be a good enough recreation of the image. Therefore my last image i have recreating is better i have also asked the model to look straight into the camera. The second image is a recreation of my first favourable image, i simply told my model to be angry, and took it on a close up. I used photoshop to make them black and white and used the burn and dodge tool to create depth on his face.
Ideas Page
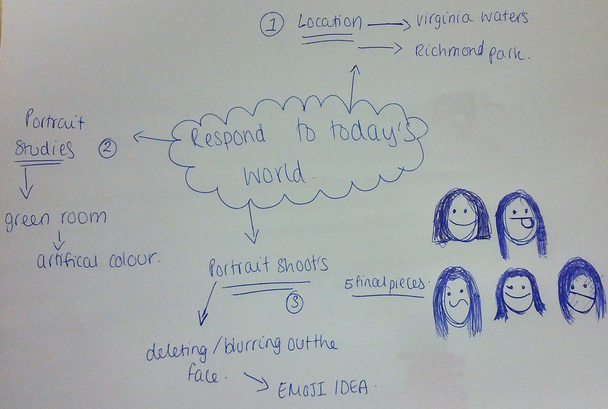
Brainstorm:
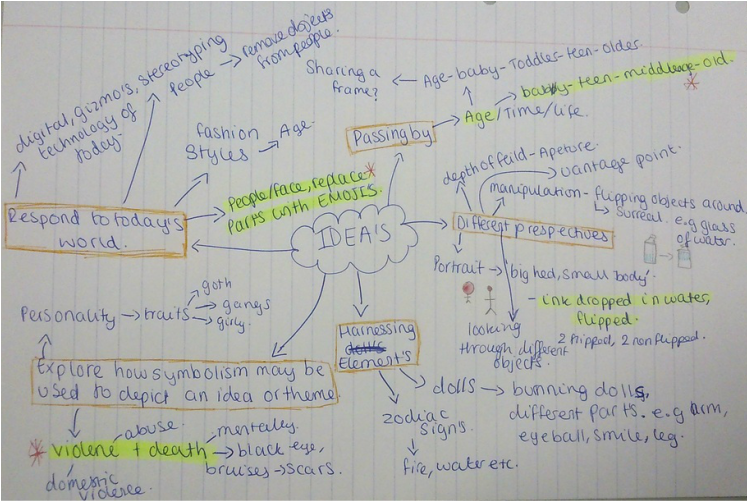
Mood Board:
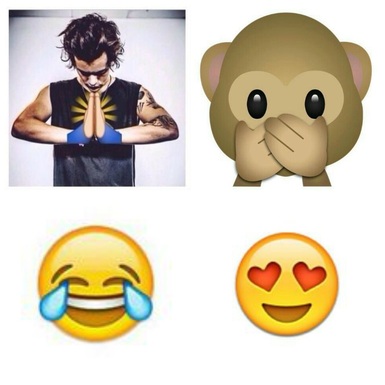
The first moodboard using whatsapp 'emojis' was my initial idea, by replacing parts of faces/bodies with these emojis. However this became to seem tacky and i didnt like it. The second moodboard is my idea which evolved from the first one.
|
|
|
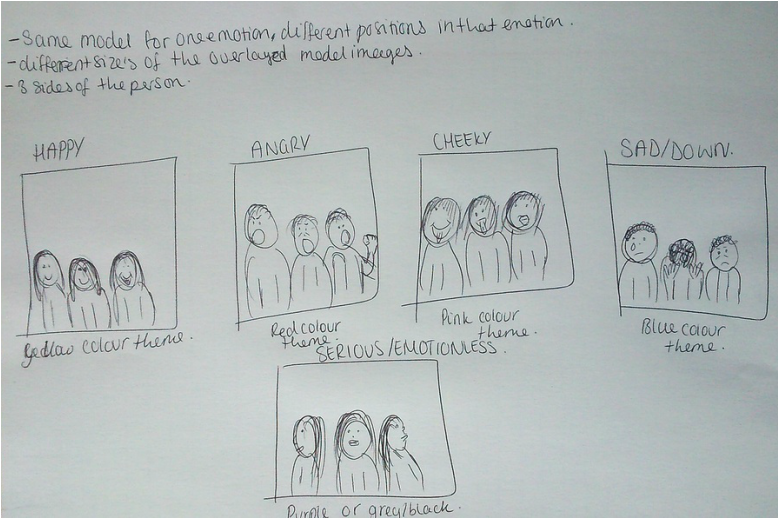
Idea:
|
Here is my final piece idea, i have chosen brief 11, 'Respond To Today's World'. For this i will be recreating emoji's on peoples faces, the faces will either be pix-elated or blurred, these will both be achieved through photoshop and having a blurred affect can be done using long exposure. Instead of using 'whatsapp emoji's', to make it look less tacky and more sinister i have decided to use the original forms of facial expressions used via text messages, e.g. ' ;) :P :/ :( :D ' which will put put over their original faces that have been either blurred or pixelated. i believe this is a good idea to respond to today's world as texting and social media are very vital parts in peoples lives in this day and age. |
|
After trying out my first thought out ideas i have progressed and developed my idea. Noe i have chosen to stay using the green room after experimenting with long exposure. However i wont be using long exposure i will just be taking pictures of people in the different emotions i have selected but i will try again with long exposure and see which works best. I will then layer these emotion images and edit the colour on it to give the photograph more mood and atmosphere.
|
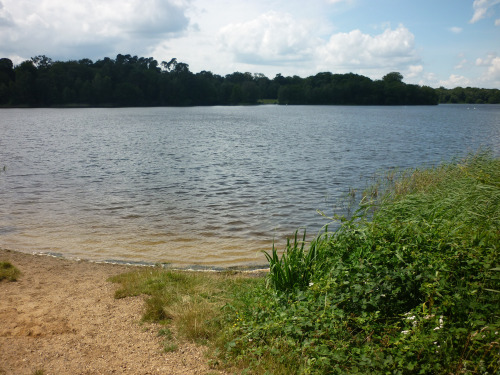
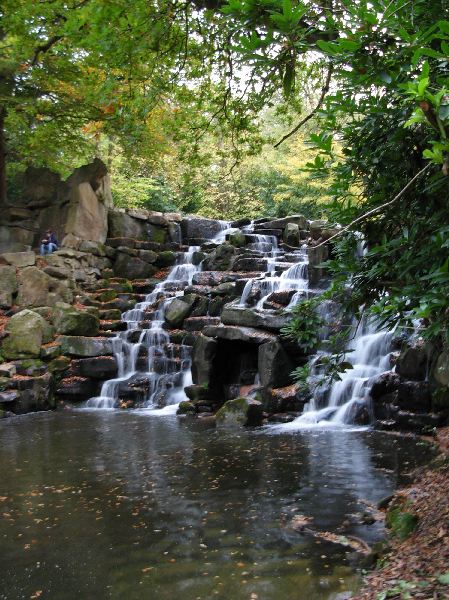
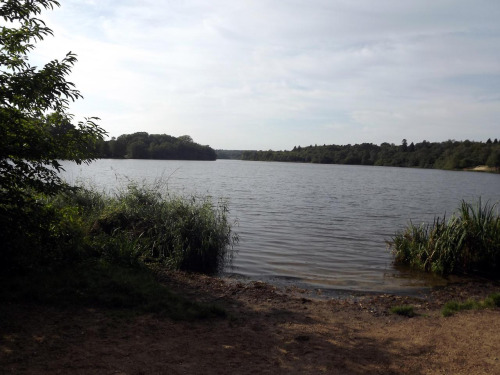
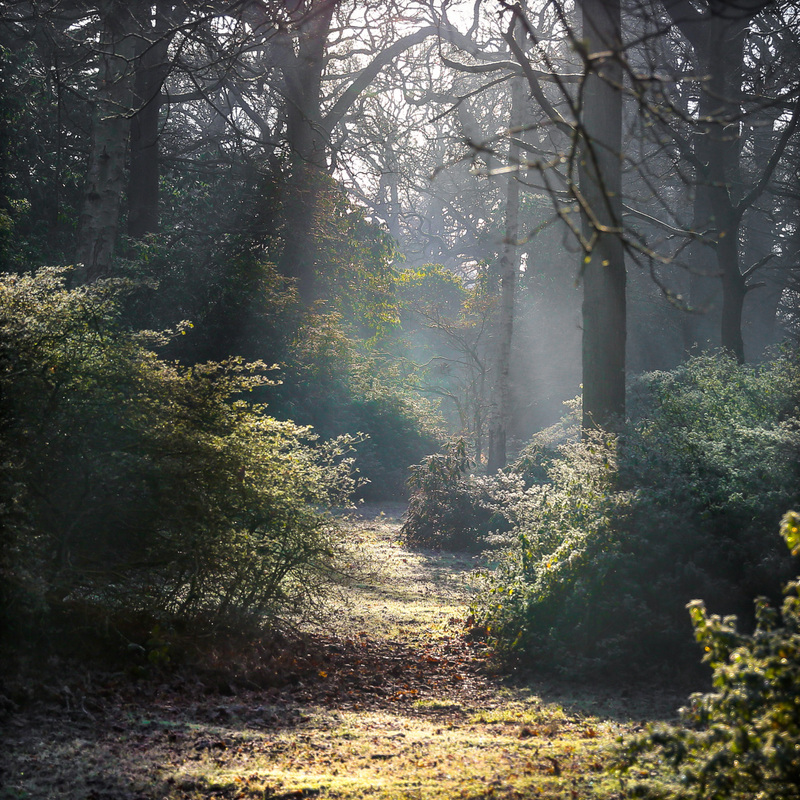
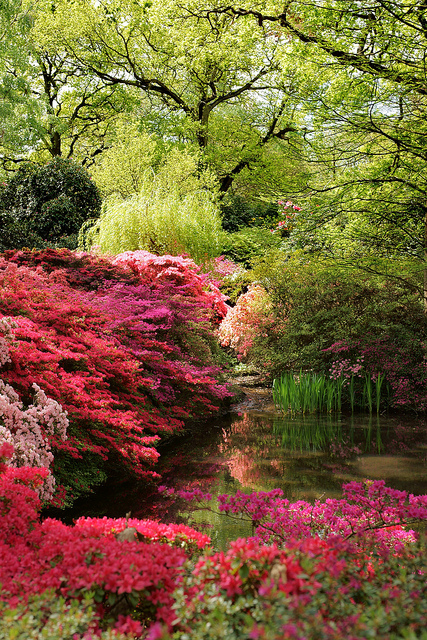
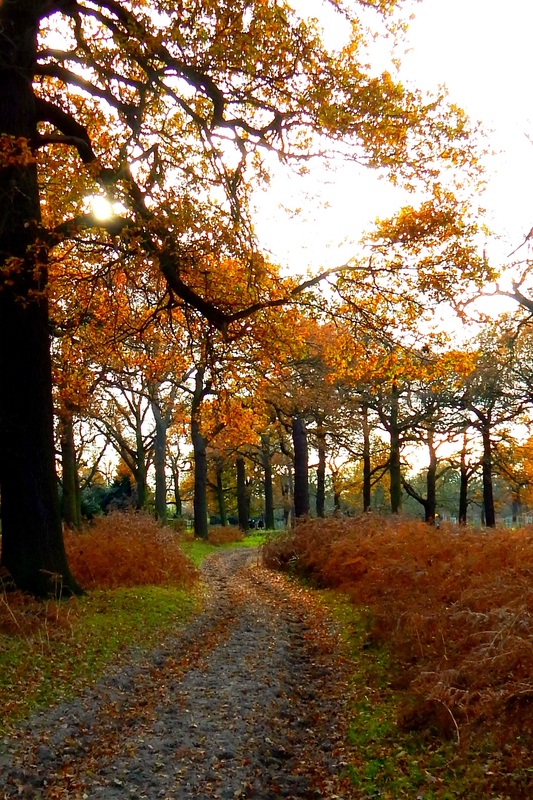
Location Ideas:
the first 3 images are one location idea i will use is virginia waters, i'm choosing this place because it has a lot of beautiful scenery. I believe i can capture a lot of different types of images regarding positioning of the model and lighting. I think that i will be able to achieve many different lighting styles in this area. The last 3 images are in Richmond Park, i want to use this place as a location for a photoshoot because there are variation of vivid colours there which will be visually appealing and it will create a good landscape photo.
the first 3 images are one location idea i will use is virginia waters, i'm choosing this place because it has a lot of beautiful scenery. I believe i can capture a lot of different types of images regarding positioning of the model and lighting. I think that i will be able to achieve many different lighting styles in this area. The last 3 images are in Richmond Park, i want to use this place as a location for a photoshoot because there are variation of vivid colours there which will be visually appealing and it will create a good landscape photo.
AO2
'Experiment with and select appropriate resources, media, materials, techniques and processes, reviewing and refining ideas as work develops'
Photoshoot 1
Location: Osterley park
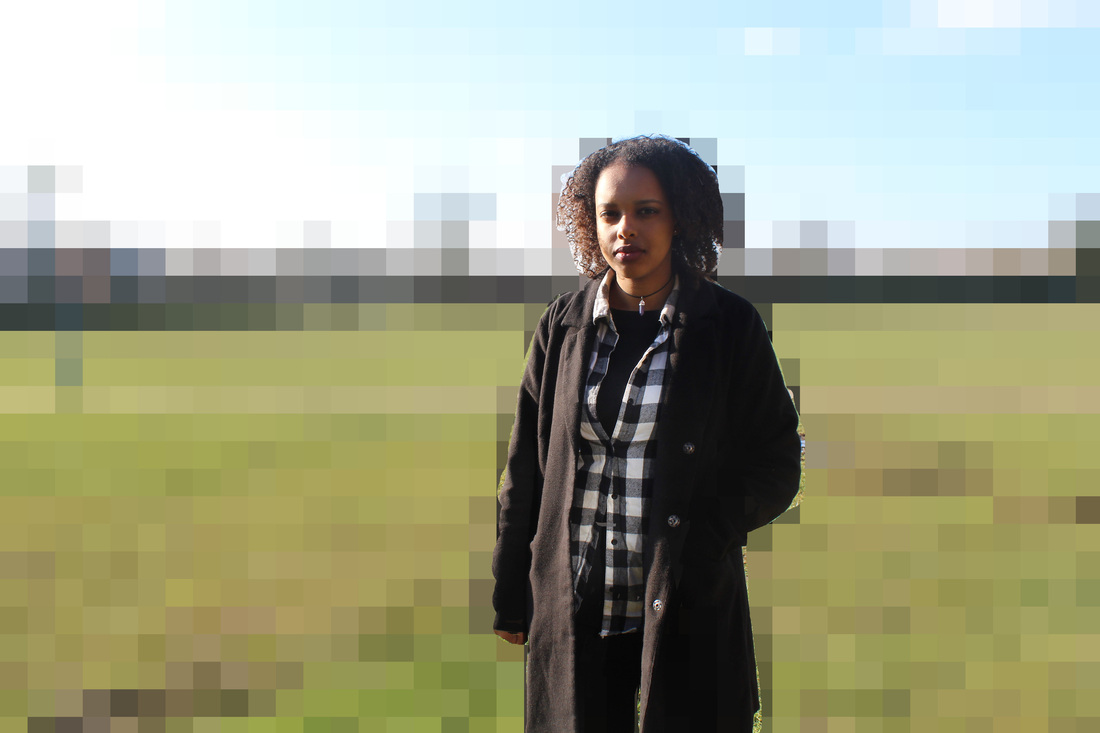
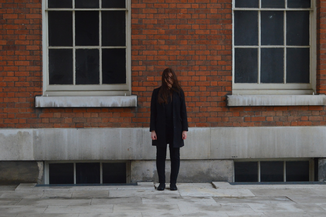
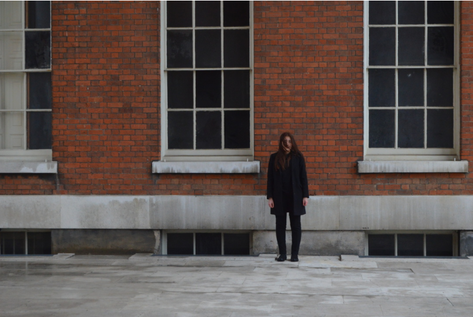
For this shoot i have dressed my model in all black for a stripped down sinister approach and used the different areas within the park to use as scenery. i am using the open space and nature of the park so that the model will be the main focus. i have taken a variety of images regarding angels and positioning, this way when i experiment in photoshop with these images i can have different pixel sizes and choose whether ill pix-elate the background or the model.
For this shoot i have dressed my model in all black for a stripped down sinister approach and used the different areas within the park to use as scenery. i am using the open space and nature of the park so that the model will be the main focus. i have taken a variety of images regarding angels and positioning, this way when i experiment in photoshop with these images i can have different pixel sizes and choose whether ill pix-elate the background or the model.
|
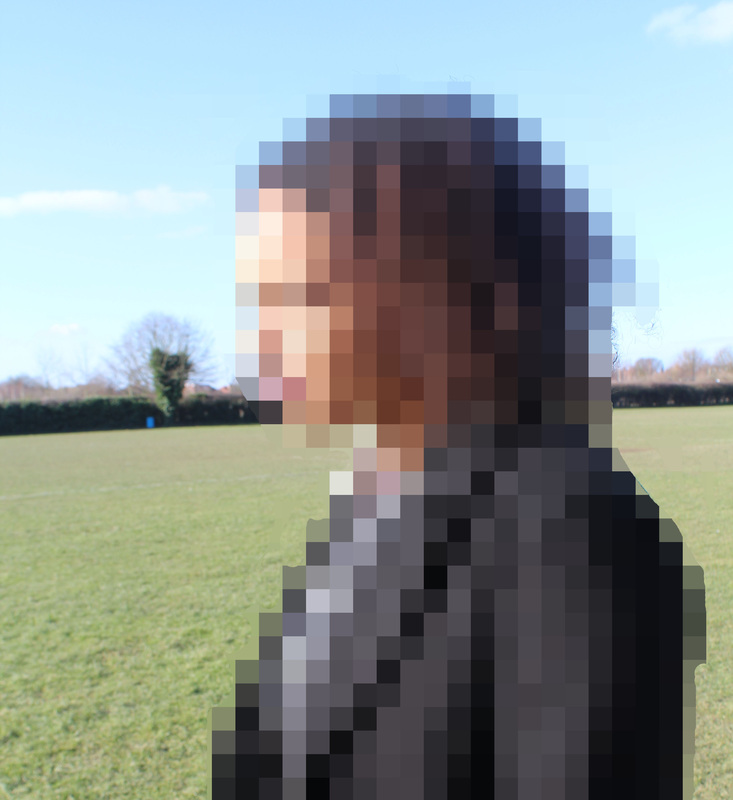
This is an image from my shoot which i particularly like. In this i have dressed my model in all black, i have done this because it will give a sinister look, not only this but when it comes to photoshopping my work it will be easier to experiment e.g. changing the colour of her clothes. i also think that her look allows her to stand out more and catch peoples eyes as it is unusual. I have chose this setting/background because i personally find it appealing. It adds to the affect of the image to have a mysterious atmosphere. when composing this photograph i made the model stand directly in the middle as well as other positions. But i found that this position brings a lot of focus to her and the image as a whole. for this i have worked in the style of Rosenmunthe - i will use photoshop to pix-elate the image.
|
|
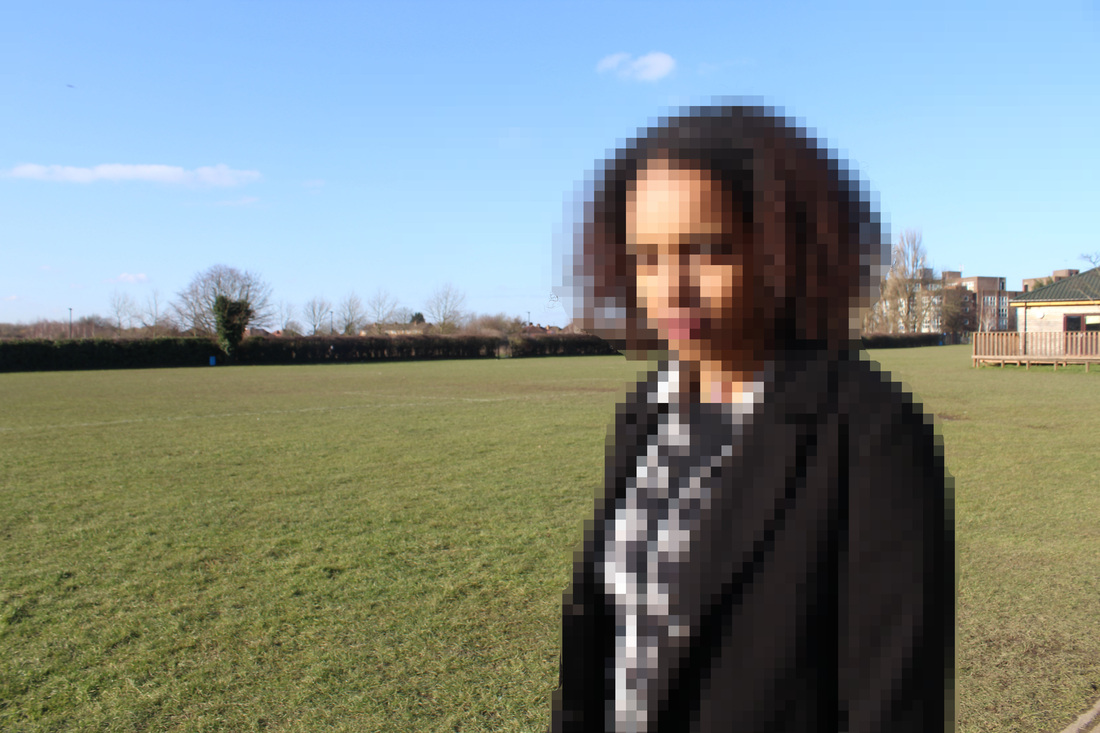
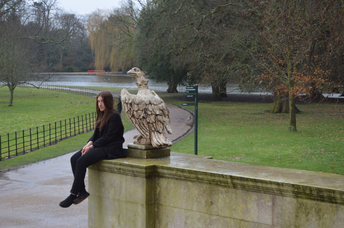
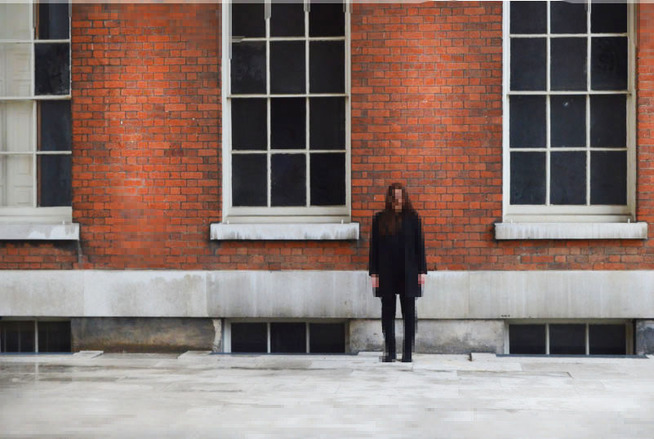
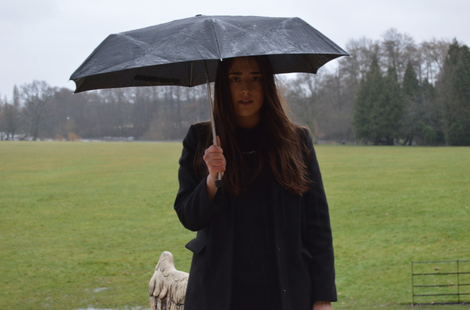
This is a second photograph from the photoshoot that i liked. i like this because it is different in terms of setting and model composition. when taking this shoot it was raining so clearly the natural lighting that i used has given a dim affect on the photographs, never the less this is a good yet different atmosphere that i would of liked to achieve. As my model is dressed in black on a dominantly green scene she stands out and looks menacing. As well as this she is sitting on a wall that is high up, this is clearly not a normal place to be sitting and i have used the rule of thirds so this becomes visually appealing rather than her centred in plane greenery. The sculpture of the bird behind her implies some sort of danger. images that i have taken in this shoot would have to be edited using photoshop to reduce the dull/boring atmosphere - This i will experiment with on photoshop.
|
|
Photoshoot 2
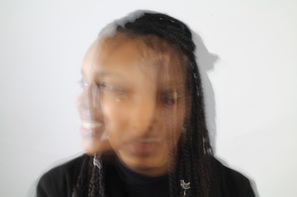
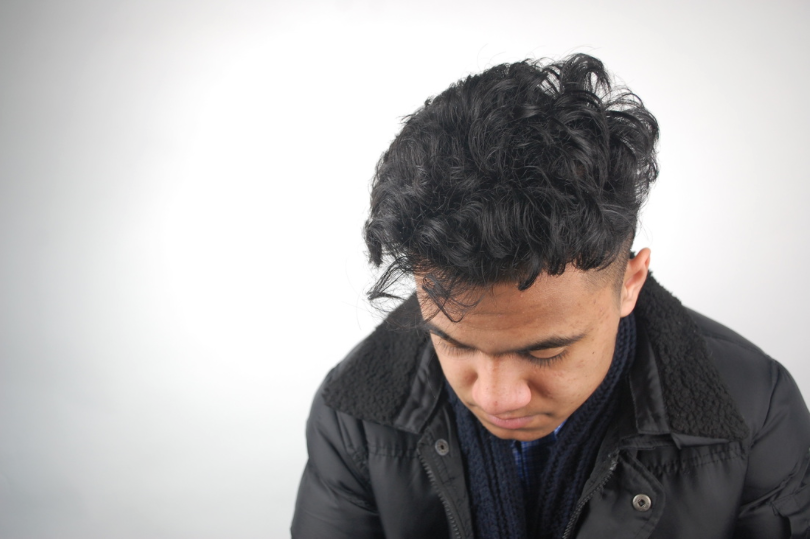
This photoshoot was taken in the green room, using artificial light. For this shoot i was using long exposure on different times, e.g 4 seconds / 10 seconds. I made my model shake his head from side to side at different paces, this will differentiate how much the face will be blurred in the images. I will use these images to experiment on photoshop with to see if i will use it as a final idea.
|
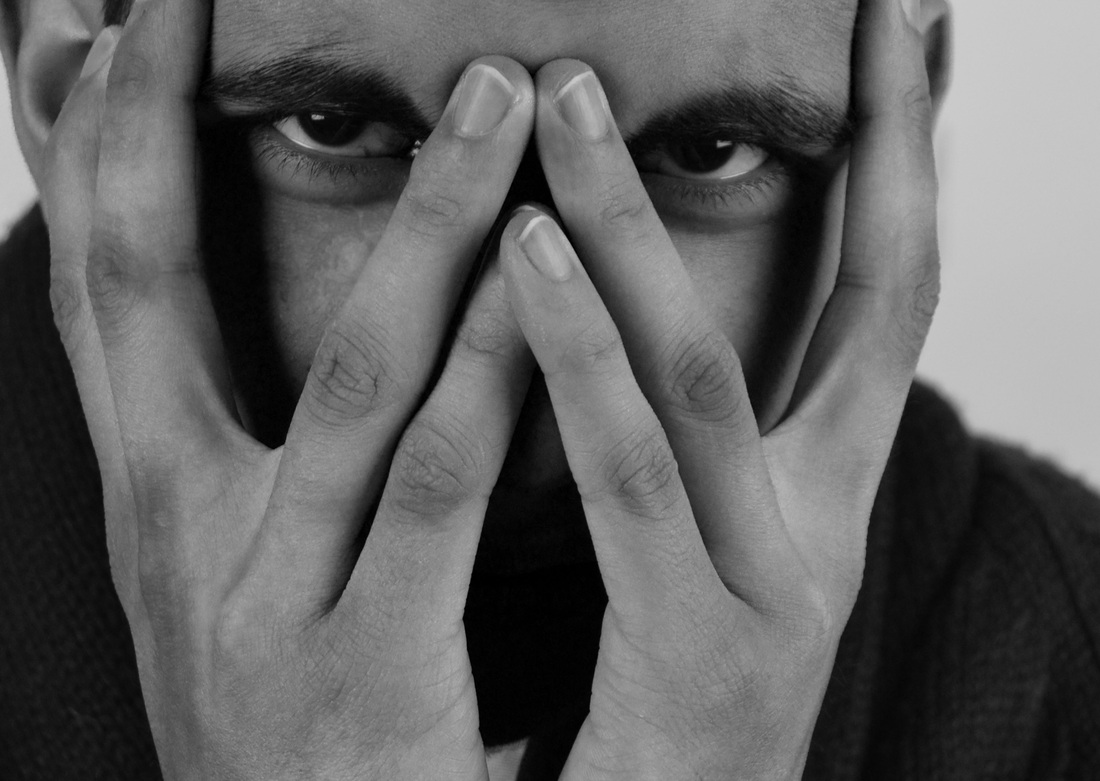
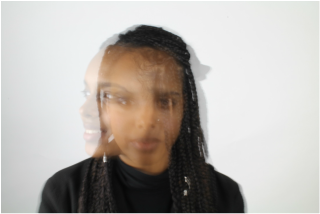
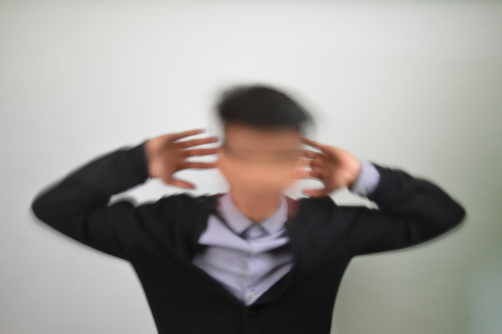
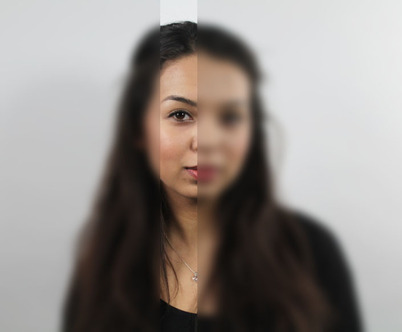
i like this image that have taken in my photoshoot, in this i have asked my model to put his hands behind his head and try to keep them still whist shaking his head decently fast from side to side using long exposure. This way the face is completely blurred and although there is mood to the image i am free to give another feel through photoshop. When experimenting with these photos on photoshop i will try to find a emoticon suitable for the expression showed by the model. I chose to do this because it gives an emotion/feeling to the photograph - Leaving an 'crazy' and 'insane' atmosphere. I have taken this shoot on a white and plain background because i do not want the colour of the backdrop to implicate any unwanted feelings to the image when being looked ay and when i am trying to get across a certain emotion.
|
|
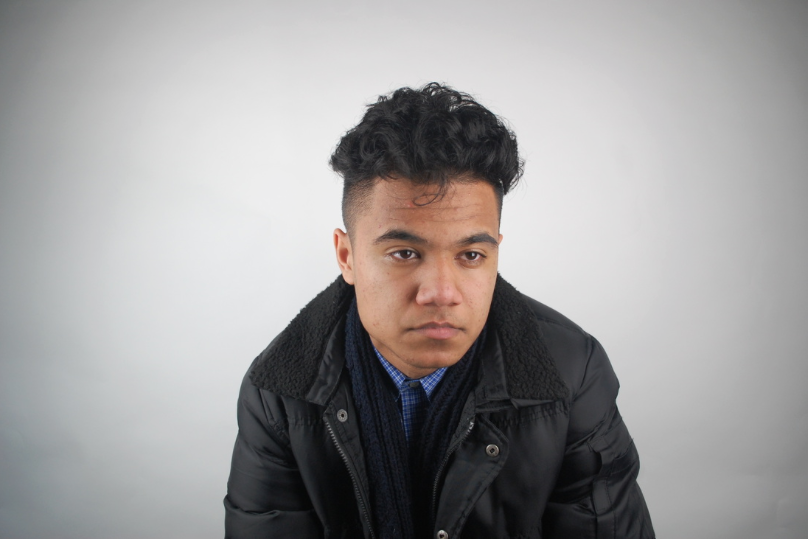
This is my second favourite photograph simply because i have tried something different and it was not part of the initial shoot. Here my model has opened his mouth and moved his head from side to side at a slow pace. I have done this so that the emotion of anger would come through the face subtly but also clearly imply it, secondly i did it at a slow pace because by doing so his face would not have been completely blurred out and the features of his expressions would be seen. This is an idea (emotion) which i do like and will experiment with to see if i want to take it further. However i will not place emoticons on his face in photoshop because it will ruin the concept of this photograph. I will attempt to enhance and play around with colours on this. |
|
Photoshoot 3
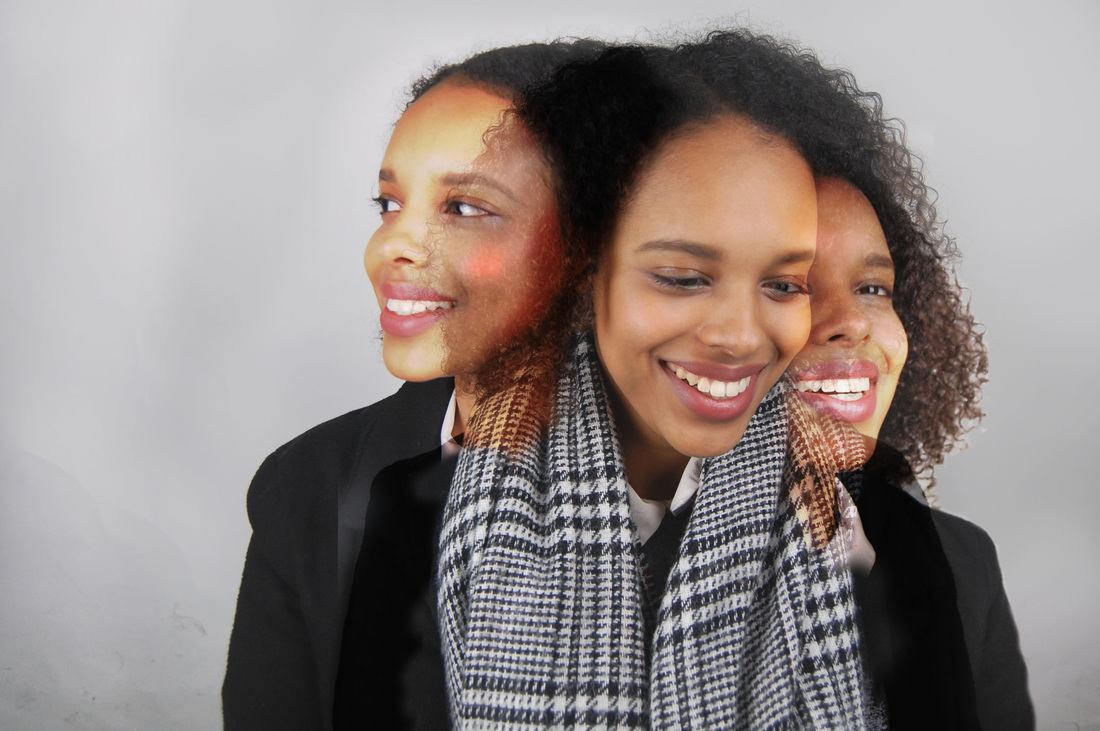
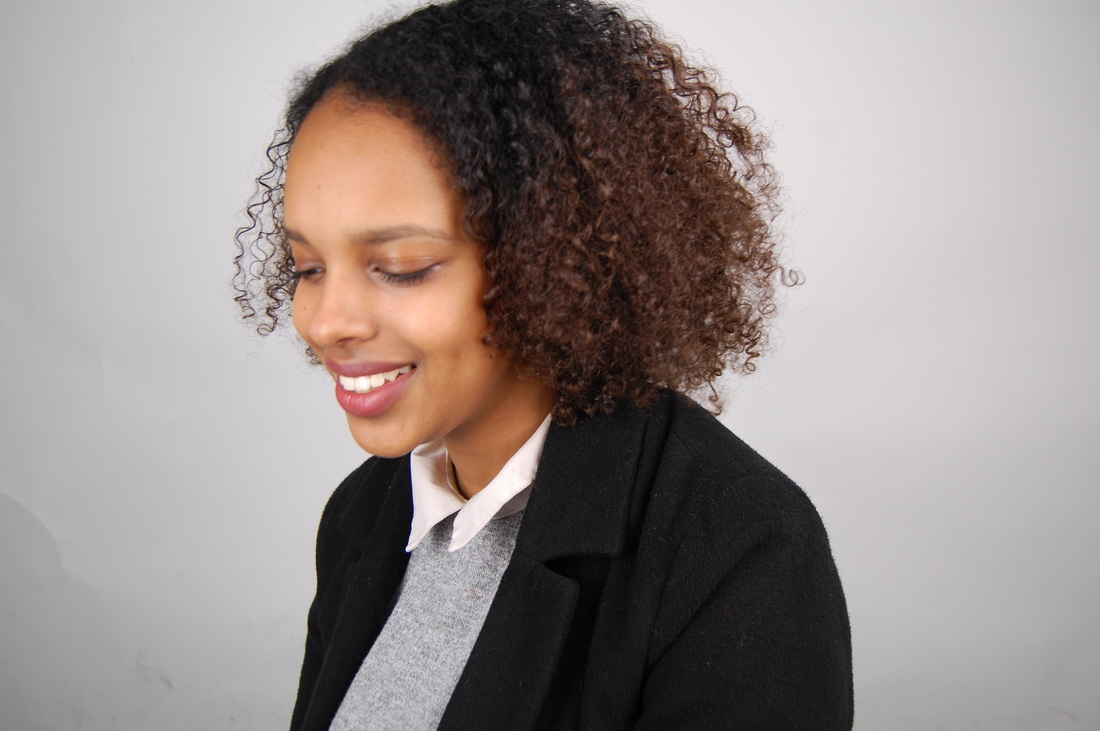
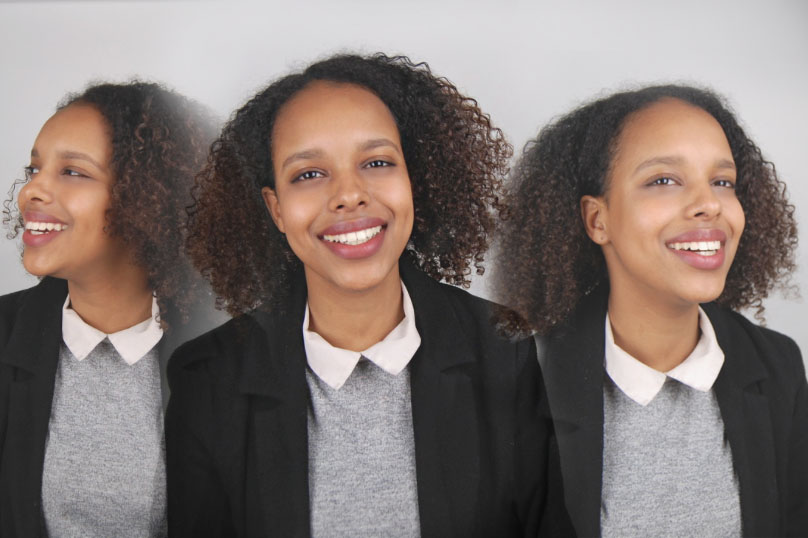
This photoshoot was done in the green room using long exposure. or this my main aim as to achieve the mood of happiness. In this photoshoot i asked my model to do various thins e.g. moving back and forth so the camera could capture different motions. For this shoot i mainly aimed to get the model smiling to portray the atmosphere of joy.
|
This is one of my favourite images from this shoot. In this is i have asked the model to t first keep a straight face, and when turned to the left to smile using long exposure. This was to show the emotions of happiness. i have lit the set with two large lights, this is so the background of the images wouldn't appear grey and dull. In this i was attempted to create the emotion and mood of happiness and joy. However I've tried to create a contrast in the emotions as she is serious firs, this is then improved in my second favourite image below. I have placed my model slightly to the left of this photograph so when it will be more visually appealing. Adding on i have made sure my model is wearing black as this will clearly show movement and not be a distraction to the face. |
|
This is another photo i like, this image is an improvement from the one above in my opinion. This is because i have asked the model to smile in both movements of the image so its just one emotion and mood shown in it. I like this image more as the long exposure on this is more visually clear almost looking like they are two different images. Furthermore i have moved the lighting close to the model and the camera so that the the lighting isn't gloomy, also i have taken this one more close up so that the facial expressions are captured in detail. When photoshopping i will sharpen the face and change the hue of the image e.g. green or yellow to represent joy and the mood of being happy. |
|
Photoshoot 4
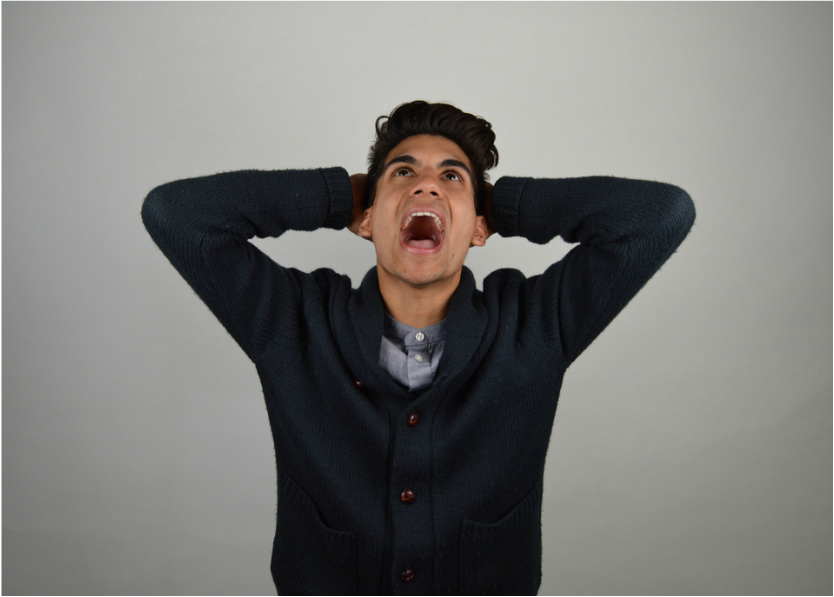
This photoshoot contains the theme/emotion of anger, for this i asked my model to show the emotions through his facial expressions. Also i took this shoot in the green room using artificial lighting. With these images i will overlay 3 different ones to create an image of his different expressions.

|
i like this photo a lot as for this shoot i have one for the theme of anger agin, however i didn't use long exposure because i overly images to imply these different emotions through photoshop. Secondly his facial expression and body language clearly shows anger/frustration in this image. Unfortunately i must say i don't like the lighting as much as it looks quite dull on his face and on the background. However although this has happened the lighting on the background has outlined the model which i do like. On photoshop i will experiment on making to background whiter and see which i one i most prefer. When lighting in this shoot i used two big lights but it did not light in the way i had hoped. Furthermore this camera shot isn't a close up, the camera is further way which i believe shows an environment of anger he is sounded in. |
|
This is another image that i like from this shoot. I personally really like this photo because of the body language used in this. Secondly I like this because he genuinely looks angry and stressed. I have centred the model as I will use this picture to experiment - this photo would be the main focus of the 3 different images i will layer and it expresses the emotion of anger the best. The use of his hands behind his head show that the model is relieving some sort of pain and anger. I found that this image itself has a lot of emotion which is what I was trying to achieve. I found that working with duplication art/ glitch art is very difficult as the directing my model was the complicated task as the model was shy of doing these poses as I had to direct the model very specifically, however this had been overcame as we kept pursuing to create good images.
|
|
Photoshoot 5
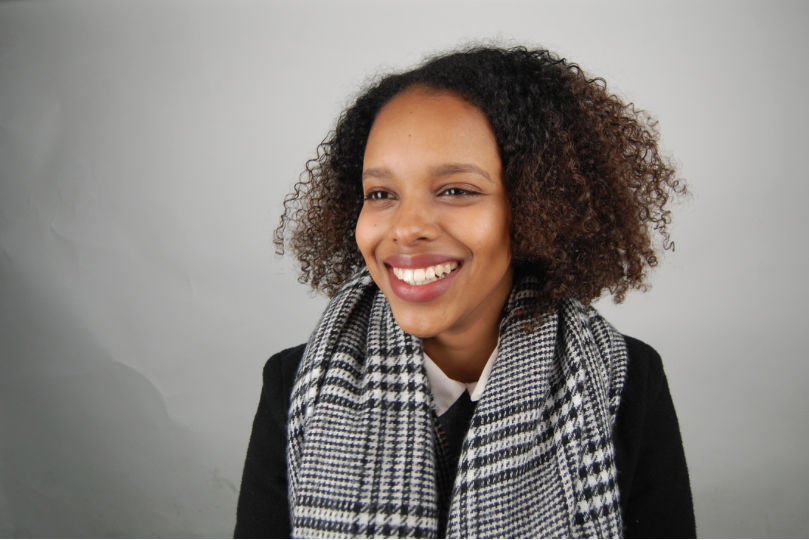
In this photoshoot i used he green room to produce these images, i am using artificial lighting. For this i have specifically chosen to create the mood of being happy. I have taken various pictures consisting of different positions so that i will have a variety of photos when it comes to photoshopping
|
this is one of my most favourable image from this photoshoot. I like this image because of the positioning of the model, she is placed slightly to the left and she is looking down smiling. I think that the result of this photograph was quite successful as i achieved the mood of happiness/joy - my aim. Secondly i do like the lighting in these images because there seems to be a glow around the model, however i will experiment in photoshop with this and make the background all white and see which i prefer. when taking these photos i made sure that i took them mainly chest upwards, this is so that when it comes to photoshopping duplication wont be a difficult process, and the images will then be placed comfortably and will be visibly clear - the theme and mood will be obvious as well as what look i am trying to achieve.
|
|
|
Here is another photograph that i liked, i like this one due to the lighting and positioning and the over all facial expression shown in it. the lighting in the once again outlines the model which allows the face to be bright and the main focus. Secondly i have positioned the model to be to the right, using the rule of birds, making the photograph more appealing. Thirdly when taking this shoot as well as a smile i wanted to achieve natural laughter and happy emotions. I was able to make my model laugh through some images and therefore producing this photograph which i personally really like as it looks and expresses real emotion. My aim for this shoot when i complete and experimentation / final piece is to give off the atmosphere of happiness, so the viewers of the image will feel jolly.
|
Photoshoot 6
This photoshoot was taken in the green room. For this i used two big lights on either side of him and faced them mostly towards the backdrop. the theme of this photoshoot was sadness which i believe was portrayed well by the model.
|
This is one of my favourite images, in this the model is looking towards the ground in sorrow, which allows the viewer to feel his sadness. I like this photograph because of the use of a narrow depth of field, the models hair and face is in focus whereas the background isn't as much. I have also used the rule of thirds for this which gives the image a more interesting appeal. As well as this i really like the lighting that has been used in this because the backdrop is very white and this allows the model to look prominent - the main focus. This image would be really good to use in an experimentation because i would be able to fit two other images in this frame and portray the emotion of sadness even more. |
|
This is another image that i liked from the photoshoot. I like this photo because the model has successfully given off the mood of sadness. Not only that but i like the way i have positioned the model in the centre, as well as that the lighting has allowed him to stand out further with a glow outlining him. This image would be used in an experimentation or my final piece, due to the fact that it sets a strong atmosphere and portrays what i wanted through his facial expression. Furthermore his body language also sells the mood, as he is slouched over. |
|
AO3
'Record in visual and/or other forms ideas, observations, and insights relevant to intentions demonstrating an ability to reflect on work and progress'
Experimentation
|
|
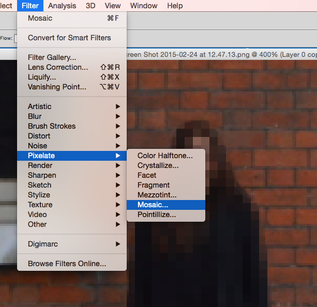
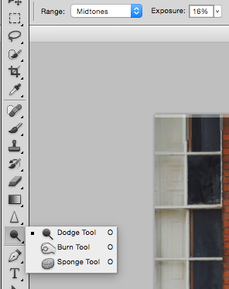
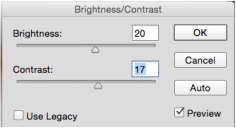
I used photoshop for this experimentation, i like the final outcome of this photograph. I adjusted the brightness and contrast on this image because it as too dark on the raw imagine as the shoot was taken in the rain. Secondly I used the dodge tool on 'midtones', i used this on the brick walls down the center. This was to add a contrast in the wall, rather than having most of the wall looking gloomya dn one tone/colour. I also used this tool on the floor, this brightened the floor which i think made it more appealing and made the image brighter. I pix-elated the image using the mosaic setting with size 10.
|
|
|
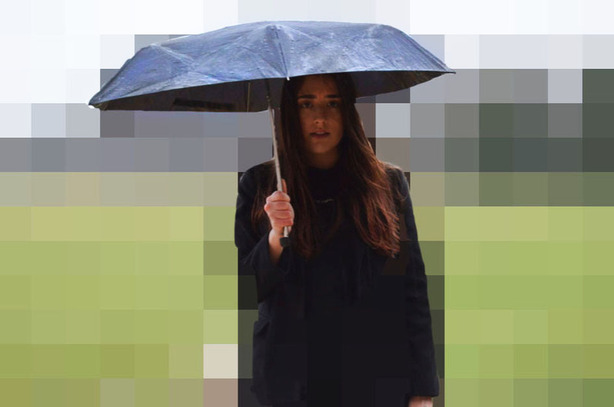
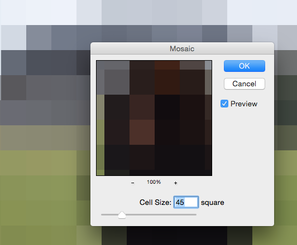
When photoshopping this i adjusted the brightness and contrast to reduce the dullness of the overall image. I used the dodge tool on 'midtones' on her face and hands to give colour because these areas were too dark. Although i dislike that it has created her face to be quite orange but this is due to the original photo being dark. Secondly, i pix-elated the whole image using the mosaic setting and made the cell size 45. Lastly, i used the sponge tool on her hair and umbrella, this was so the image was too dark, and it would be more visually appealing to birghten it up by including colour.
|
|
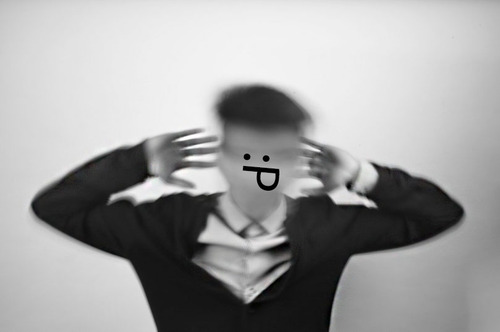
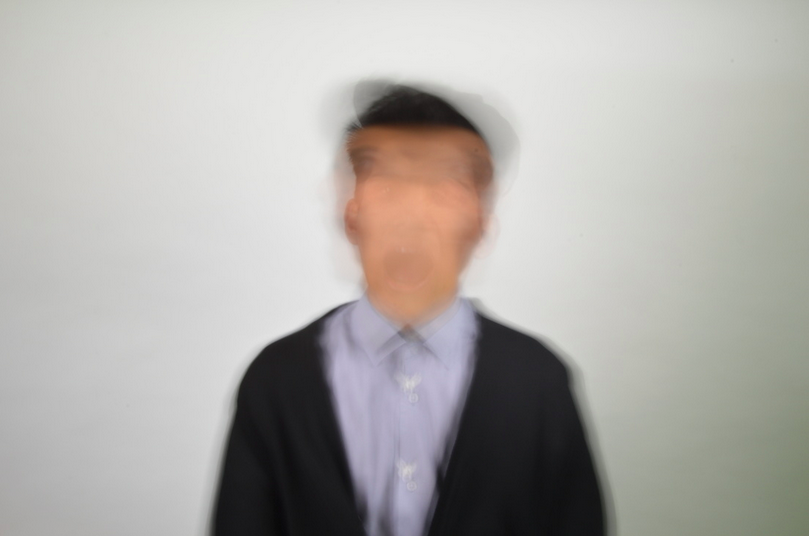
Before:
|
After:
|
|
|


|
|
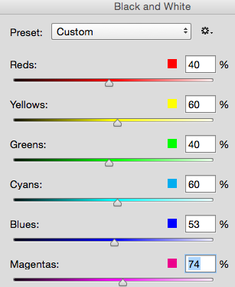
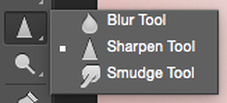
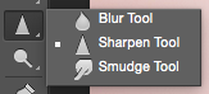
This was my initial idea for respond to todays world. Firstly i changed the brightness/contrast to reduce the photograph from being dim. Secondly I made the image black and white because i think it looks better this way as well as working in the style of my collection of images - Anon photographer. I adjusted the blues and magentas on this and made them a bit higher which contributes to the contrast and brightness. I then used the text box to create my emoticon, i decided to use the tongue face because i feel it suited the image and created a cheeky mood, even though at first it gives off a unstable atmosphere i decided to change this. Lastly i used the sharpen tool on his clothes and arms as these parts were quite blurry, they needed to be more prominent. i did not sharpen the face. Personally i have mixed feelings towards this idea as i much prefer the experimentation i did below. |
|
Before:
|
After:
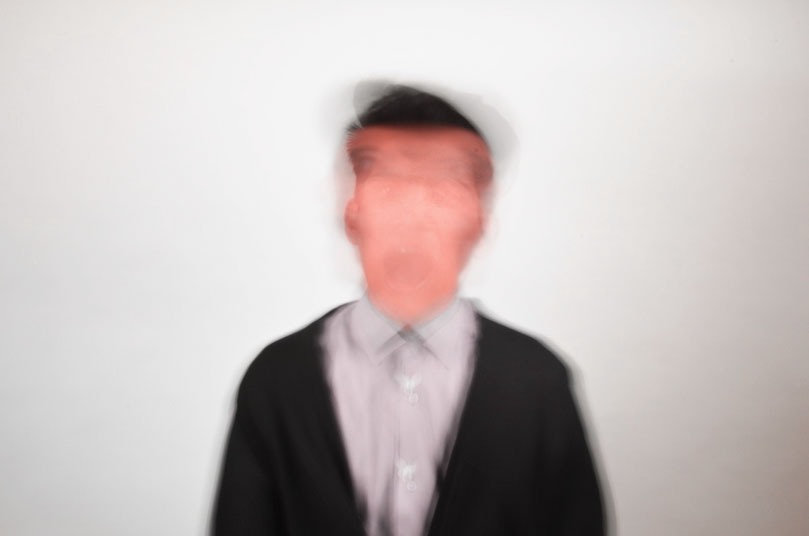
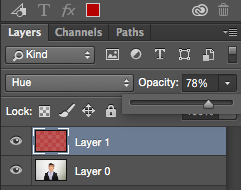
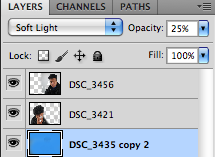
#1: On the first experimentation i increased the brightness/contrast. Secondly i added a new layer and and with the brush, brushed over the whole image in red and overlayed it in Hue and changed the opacity to 78%. I chose red because the image is expressing anger and this colour best represents this. From the experimentation of this shoot this one id my favourite and i will take this further and see if i will make this my final idea.
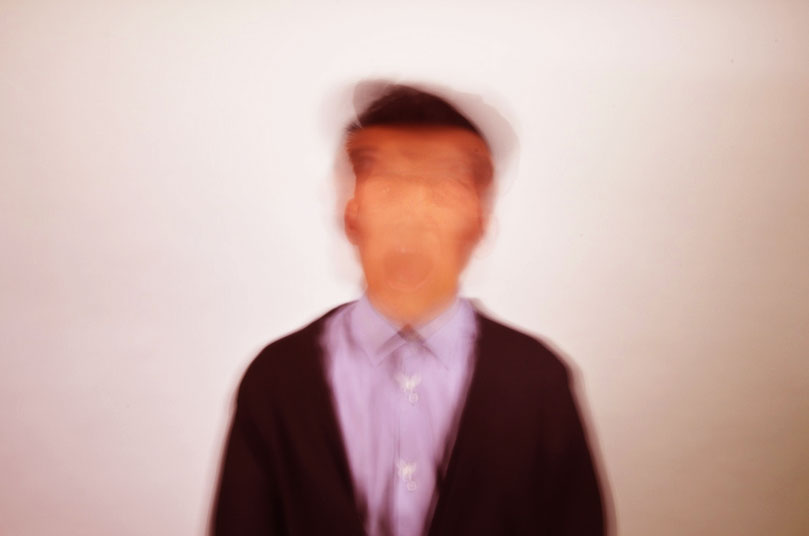
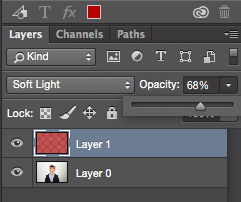
#2: For the second experimentation i have kept the same level of brightness/contrast as the one above and used the brush to brush red over the whole photo, then overlayed this using soft light and made the opacity 68% this way the expressions are still visible. Lastly i sharpened his clothes and face.
|
Experimention
|
|
|
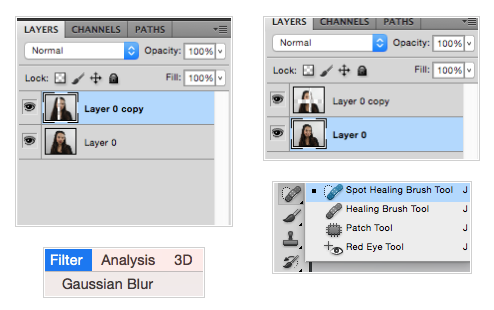
This i an experimentation i did to explore photoshop and see the options i have with my final pieces. I used the healing tool to get rid of any spots. i duplicated the background layer, and I used Gaussian blur filter on the image and then cropped out the section of the photo which i wanted to be visibly clear.
When experimenting with this idea i took it further i started off by experimenting on a original image and selected his eyes to be in focus, and then decided to make an image black and white using an extra layer. Therefore when i cropped out the part of the image i wanted not blurred it was the original colour of the image. I quite liked this as it showed a contrast in colours, not only this but the sections of the face i chose has been given more meaning and expressed the models anger even more through the use of the black and white and the Gaussian blur on the rest of the image. |
|
|
|


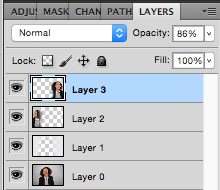
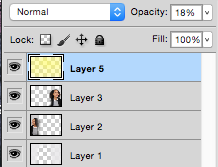
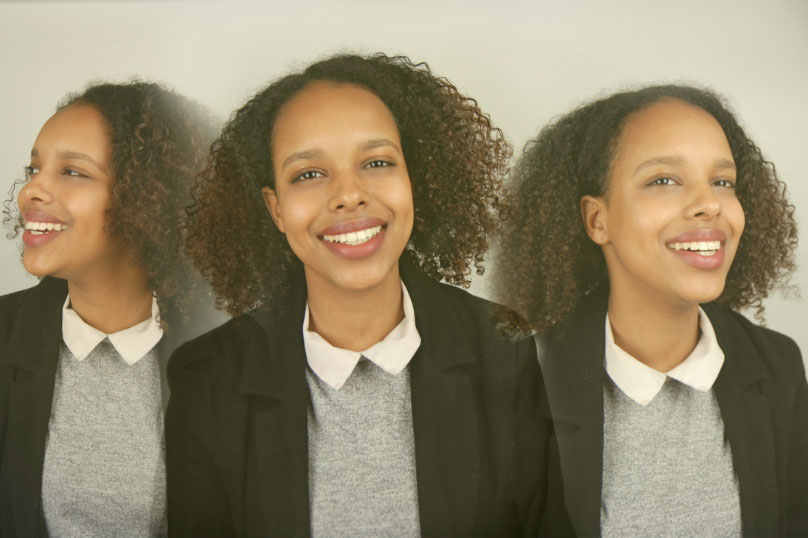
This is an experimentation for my idea which i want to use for my final piece. In this first experimentation i created three layers by adding in three different pictures that i liked from this shoot. i adjusted the brightness and contrast level but making them higher. Secondly i used the healing tool for any blemishes on her face. Thirdly i used the eraser on the different layers to remove the outline of the images and made the three images look more blended in as one image. I also played around with the opacity on each layer. For the second experimentation i added a fifth layer and then took the paint brush and painted over the entire image with yellow. i then used soft light as the overlay and turned down the opacity to 18%. I prefer the first experimentation because it gives off a happier mood than the second one, the second one i believe gives off a dull vibe.
|
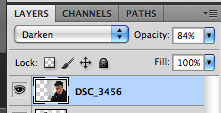
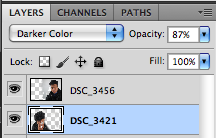
this is one of my final piece experimentations. for brightness and contrast i have adjusted them on each individual image/layer when photo shopping, and then adjusted it as a final image at the end. secondly i used the healing tool to remove all spots and blemishes on the models face. Furthermore i used the sponge tool on his eyes, and the burn tool on the models eyebrows and hair. For blending in these images i had 3 layers for each image, and using the eraser i removed and parts of the images borders so that it looks like one photograph. Furthermore for the first layer i used the overlay darken and reduced the opacity to 84%. On the second layer i used the overlay darken colour, and reduced the opacity of this to 87%. For the final layer i duplicated it and then using the pain tool i brushed over a light blue all over the image. I then used the overlay soft light on this and made the opacity 25%. This blue tint will bring out the emotion of sadness even more, and help set the mood.
|
Final Piece Photoshop
|
This is going to be used as my final piece. i am pleased with the outcome of this as it does what i wanted - conveys the emotion of happiness. For this i have used 3 separate layers and then erased the background and any unwanted parts of the images. I then emerged the images together and placed them where i feel was appropriate. i overlapped two images where the eyes meet - creating an illusion. On the images i used the overlay hard light. this allowed reds/oranges to be shown wherever overlayed. However these colours weren't as vibrant as i reduced the opacity. I used the dodge tool to define her eyebrows and the healing tool for any blemishes. |

|
|
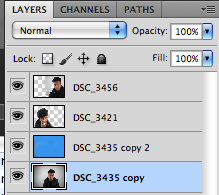
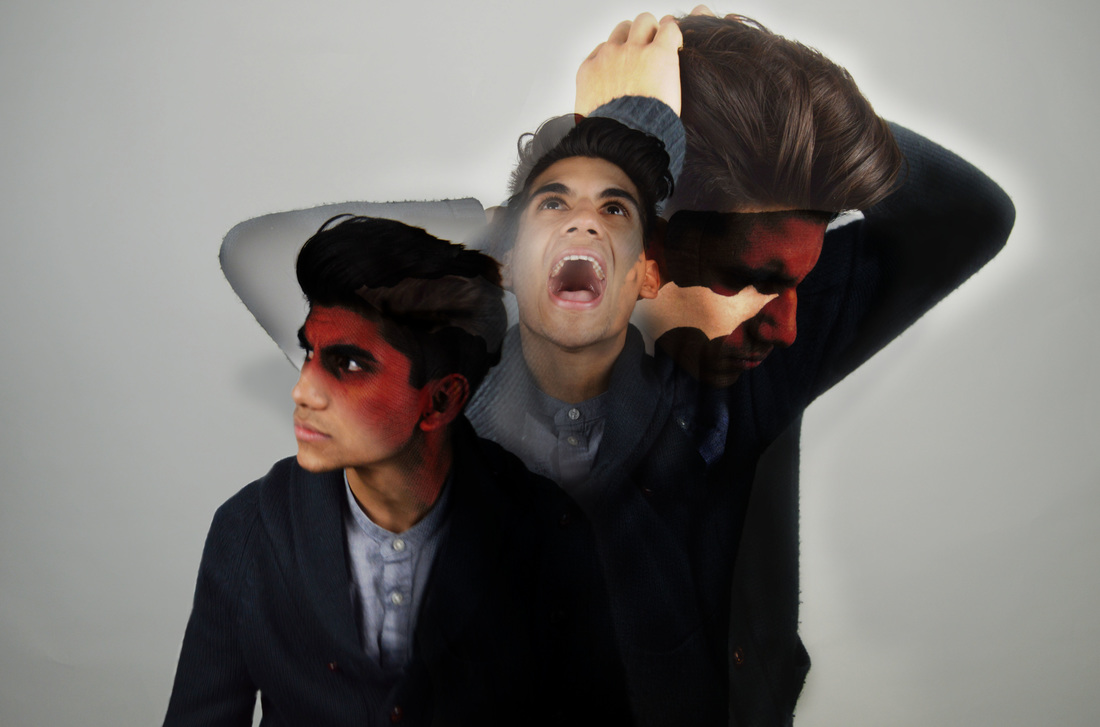
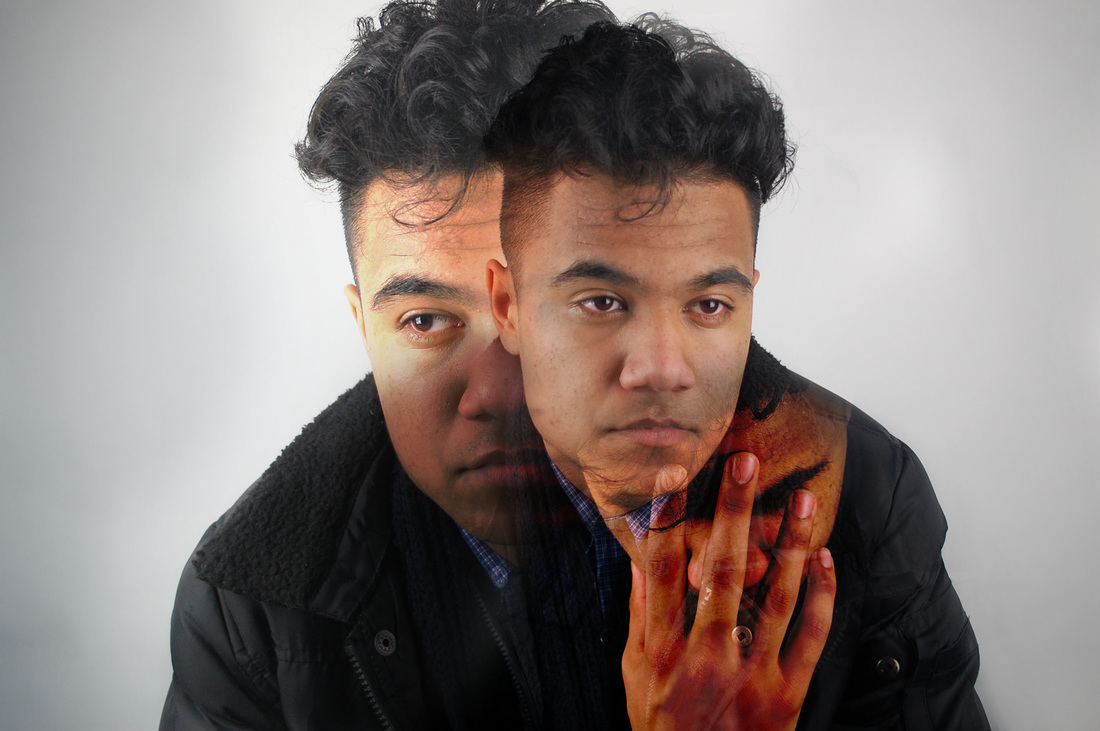
I think this is my most successful final piece. I like this a lot as it clearly expresses anger. I used three different layers for the images and then erased unwanted parts of images - then emerged them to where i thought was appropriate. I used the healing tool for spots and blemishes. Furthermore i used the sharpen tool for his eyes and jaw line as this would define it and show the anger through his facial expressions. i used hard light on all the image layers, this was very successful and convenient i thought because where images were overlapped it would bring out a strong red. Seen as this is conveying anger and the overlapping occurred on the faces, it looked very good and further showed the emotion. i also used the dodge tool to blend in the two arms on the right of the image, creating a illusion. |
|
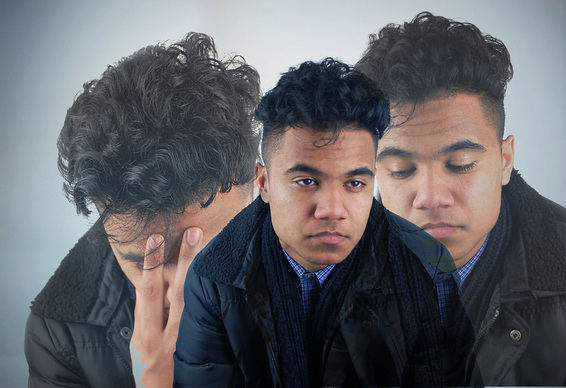
For my last final piece i was showing sadness. I like this image especially because the third photograph is only placed within another layers image, which i believe shows more of what the image expresses emotionally. once again i used three different layers and blended the photos together where i wanted them. Furthermore i used the overlay hard light on all three photographs - bringing out colour to the final image. I used the healing tool to get rid of spots and blemishes, as well as this i used the sponge tool on his eyes and near the eye duct to make them look more red and watery. Lastly i tried to produce another illusion in this image which would be the models shoulders on either side both from different images, that have come together to look like one body/image. |

|
AO4
'Present a personal, informed and meaningful response demonstrating critical understanding, realising intentions and, where appropriate, making connections between visual, written oral or other elements'
Final Pieces
Anger

Sadness
Happiness